Sash Cord Replacement: Complete DIY Guide
In this article, you’ll discover:
- How to tell when sash cords need replacing
- Step-by-step replacement process with clear instructions
- Cord types compared — waxed cotton, synthetic, and chain
- Tools you’ll need (most you probably already own)
- How to rebalance sash weights after replacement
- When to hire a professional instead
Introduction
A broken sash cord is the most common reason timber sash windows stop working properly. One day the window slides smoothly; the next, the sash drops when you let go or won’t stay open at all.
The good news? Sash cord replacement is genuine DIY territory. You don’t need specialist tools, the materials cost under £20, and the whole job takes roughly 60-90 minutes per window once you know what you’re doing. The first one always takes longer.
We manufacture sash windows with modern spring balances and traditional weight systems. This guide covers traditional corded sash windows — the type found in most Victorian and Edwardian homes. If your windows use spring balances, the process is different.
Signs Your Sash Cords Need Replacing
Don’t wait for complete failure. These signs indicate cords are deteriorating:
The most obvious symptom is a sash that won’t stay open — it slides down under its own weight when you release it. You might also notice one side dropping faster than the other, creating a visible tilt. Frayed or visible cord damage in the weight pockets is another clear signal.
Sometimes you’ll hear the weight drop inside the box frame — a distinctive thud that means the cord has snapped completely. If one cord has failed, the others are likely close behind. We’d always recommend replacing all cords in a window at once rather than just the broken one.
What You’ll Need
Tools
Most of these are basic household items:
- Stiff putty knife or chisel — for removing staff beads
- Screwdriver — for accessing weight pockets
- Pliers — for removing old nails and cord clips
- Hammer — for refitting beads and nails
- Scissors or sharp knife — for cutting cord
- Pencil — for marking cord length
- Small nails (25mm) — for securing cord to sash
Materials
- Sash cord — enough for all four cords in the window (typically 3-4 metres per cord)
- Optional: new staff beads — if originals are damaged during removal
Cord Types Compared
Not all sash cord is equal. Your choice affects how long the repair lasts.
Waxed Cotton Cord
The traditional choice and still the best for most applications. Pre-waxed cotton cord runs smoothly over pulleys, resists moisture, and lasts 15-25 years in normal conditions. It stretches slightly when new, then settles. Buy 8mm diameter for most domestic sash windows — check your existing cord if unsure.
Synthetic Cord (Nylon/Polyester)
Synthetic alternatives resist rot better than cotton and cost slightly less. They’re slippier over pulleys, which can feel different to operate. Some synthetics stretch more than cotton, potentially affecting balance over time. A reasonable choice for less exposed positions but cotton remains the professional’s preference.
Sash Chain
Metal chain eliminates cord failure entirely — it simply doesn’t wear out in the same way. However, chain is noisier, doesn’t flex as smoothly over pulleys, and requires pulley replacement (larger diameter wheels). It’s worth considering for windows where access is difficult and you want a permanent solution.
Our Recommendation
Waxed cotton cord, 8mm diameter. It’s what joiners have used for over a century and it works. Don’t overthink this.
Step-by-Step Replacement
Work methodically and the job is straightforward. Here’s the process.
Step 1: Remove the Staff Beads
Staff beads are the thin mouldings running vertically inside the window frame, holding the lower sash in place.
Score the paint line between the bead and the frame with a sharp knife — this prevents paint tearing. Starting from the middle of the bead, work a stiff putty knife or thin chisel behind it and gently lever outward. Work along the length, easing the bead away gradually. Don’t force it or you’ll split the bead.
Once one side is free, remove the opposite staff bead the same way. The bottom sash can now swing inward.
Step 2: Remove the Lower Sash
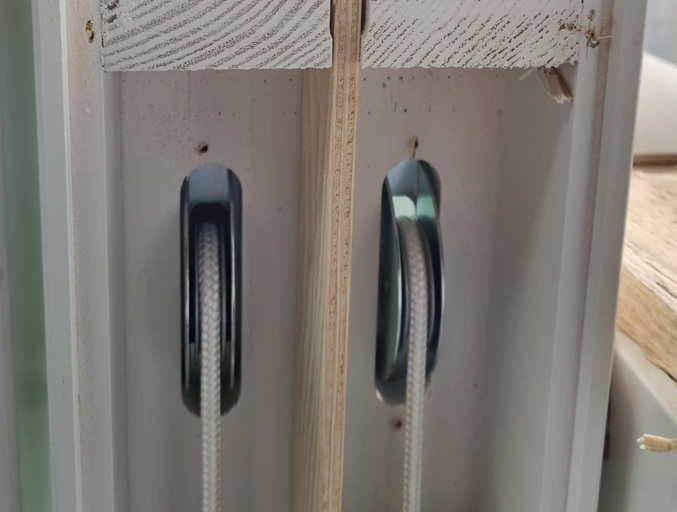
Swing the lower sash inward and disconnect the cords. The cords attach to the sash sides — usually nailed into a groove or held by a knotted cord in a channel. Cut the cords if they’re still intact (hold the free ends so the weights don’t drop) or simply pull out any remaining cord fragments.
Rest the sash somewhere safe. Now you can see the parting bead — the strip separating the two sash tracks.
Step 3: Remove the Parting Bead and Upper Sash
Pull the parting bead straight out from its groove — it’s usually a friction fit, not nailed. With the parting bead removed, the upper sash can come forward. Disconnect its cords the same way.
You now have both sashes removed and access to the weight pockets.
Step 4: Access the Weight Pockets
Look for small removable panels (pocket pieces) in the lower portion of each side of the box frame. These are usually held by a single screw or paint adhesion. Remove the pocket piece to reveal the sash weights inside.
Pull each weight out and note which position it came from — weights for the upper and lower sashes are different sizes. Untie or cut the old cord from each weight.
Step 5: Thread New Cord
This is the part that tests patience. Feed the new cord over the pulley at the top of the frame and down into the weight pocket. If the cord won’t feed through, a small lead weight (a “mouse”) tied to string helps — feed the string first, then use it to pull the cord through.
Tie the cord securely to the weight using a figure-of-eight knot. Replace the weight in the pocket.
Step 6: Set the Cord Length
Getting the length right matters for proper operation. With the weight resting on the bottom of the pocket, pull the cord taut over the pulley. Mark the cord level with the top of the sash groove.
Cut the cord about 50mm below this mark — this extra length accounts for the knot or nail fixing at the sash. The weight should hang roughly 75mm above the bottom of the pocket when the sash is fully closed.
Step 7: Attach Cord to Sashes
Nail or knot the cord into the groove on each side of the sash. Use 25mm nails at roughly 75mm intervals if nailing. Ensure the cord sits flat in the groove without bunching.
Repeat for all four cords (two per sash). Replace the upper sash first, then the parting bead, then the lower sash, then the staff beads.
Step 8: Test and Adjust
Both sashes should now slide smoothly and stay in any position you leave them. If a sash drops slowly, the cord may be slightly too long — the weight is bottoming out before the sash closes fully. If the sash won’t close completely, the cord is too short.
Minor adjustments are normal on the first attempt. Don’t be discouraged.
Rebalancing Sash Weights
While you have the weights out, it’s worth checking they’re correct.
Weight Matching
Each weight should be approximately half the weight of its corresponding sash (including glass). The lower sash weights are typically lighter than the upper sash weights because the upper sash is usually heavier (more glass, thicker frame).
If sashes don’t balance properly after cord replacement, the weights may have been swapped at some point. Weigh each sash and adjust accordingly — additional weight can be added by drilling a hole in the lead weight and pouring in extra lead, or you can source replacement weights.
When Weights Need Replacing
If your windows have been reglazing with thicker double-glazed units, the original weights won’t balance the heavier sashes. You’ll need heavier weights — or a conversation about whether spring balances might work better for your situation.
When to Hire a Professional
Sash cord replacement is manageable DIY, but some situations justify professional help.
Consider a professional if your windows have significant timber decay (the repair may need more than just new cords), the sash weights are missing or incorrect, the pulleys need replacing (common in older windows), or you’re dealing with very large or heavy sashes that are difficult to handle safely alone.
Professional sash cord replacement typically costs £150-250 per window, including cord, labour, and any minor adjustments. If multiple windows need attention, most joiners offer better rates for batch work.
For windows where the timber is beyond repair, replacement timber sash windows with modern spring balances eliminate cord maintenance entirely.
Frequently Asked Questions
How long does sash cord last?
Waxed cotton sash cord typically lasts 15-25 years depending on use and exposure. Windows opened daily wear cords faster than rarely used ones. Synthetic cord lasts slightly longer but can stretch more over time. Replacing all cords at once is more efficient than addressing them individually as they fail.
Can I replace sash cord without removing the sashes?
Not properly, no. You need to remove both sashes to access the weight pockets and correctly set cord length. Shortcuts exist — feeding cord through without removing sashes — but they rarely result in properly balanced windows and you can’t inspect the weights or pulleys.
What size sash cord do I need?
Standard domestic sash windows use 8mm diameter cord. Larger Georgian or Victorian sashes may need 10mm. Check your existing cord before ordering — or measure the pulley groove width. Too-thin cord wears faster; too-thick cord won’t run smoothly over the pulleys.
Should I replace all cords at once?
Yes. If one cord has failed, the others are the same age and likely close behind. Replacing all four cords takes only marginally longer than doing one, and you avoid repeating the disassembly process when the next cord fails months later.
Is it worth converting to spring balances?
Spring balances eliminate cord maintenance entirely and can accommodate heavier double-glazed sashes. They’re worth considering when replacing windows or carrying out major sash window restoration. For routine cord replacement on otherwise sound windows, traditional weights remain perfectly effective.
Conclusion
Sash cord replacement is satisfying DIY — the kind of repair that produces an immediately noticeable improvement. A window that’s been dropping or sticking for months suddenly slides like it should.
Take your time on the first window, replace all cords at once, and use quality waxed cotton cord. The whole job costs under £20 in materials and saves you £150-250 per window in professional fees.
If your sash windows need more than new cords — or you’re considering replacement — get in touch for a free quote on bespoke timber sash windows with either traditional weights or modern spring balances.


Leave a Reply
Want to join the discussion?Feel free to contribute!