Matching Timber Windows to Your Home’s Architecture
In this article, you’ll discover:
- How to identify the correct window style for your property’s era
- Georgian, Victorian, Edwardian, 1930s and modern window characteristics
- The glazing patterns that define each architectural period
- Common mistakes that make replacement windows look wrong
- How proportion and sightlines affect authenticity
- Why getting the details right protects your home’s value
Introduction
Windows are the eyes of a building. Get them right and a period home sings — the proportions feel balanced, the detailing looks intentional, the whole facade comes together. Get them wrong and something feels off, even to people who can’t quite say why.
That “something’s wrong” feeling is almost always down to mismatched windows. A Victorian terrace fitted with plain modern casements, a 1930s semi given mock-Georgian bars, an Edwardian villa stripped of its delicate top-lights — these mistakes are surprisingly common, and they quietly undermine a home’s character.
The good news is that matching windows to architecture isn’t difficult once you understand the principles. Each era has recognisable window styles, glazing patterns, and proportions. Learn to read them, and you can specify replacements that look like they belong.
We manufacture bespoke timber windows in styles appropriate to every period of British housing. This guide explains how to match yours correctly.
Reading Your Home’s Era
Before choosing windows, identify what you’re working with. British housing falls into broadly recognisable periods, each with distinct window conventions.
The clues are everywhere: brick bond and colour, roof pitch, door style, decorative details, and of course the original windows if any survive. Neighbouring properties that retain original features are an invaluable reference — walk your street and look at what the best-preserved houses still have.
If you’re genuinely unsure, local history societies, estate agent listings of similar properties, and conservation area appraisals (published by your council) all help pin down the period and its appropriate detailing. Historic England’s listing and research resources can also help you understand your property’s age and significance.
Georgian Windows (1714-1837)
The earliest period most homeowners encounter, the Georgian era established the principles of classical proportion that defined British window design for over a century.
The Six-Over-Six Sash
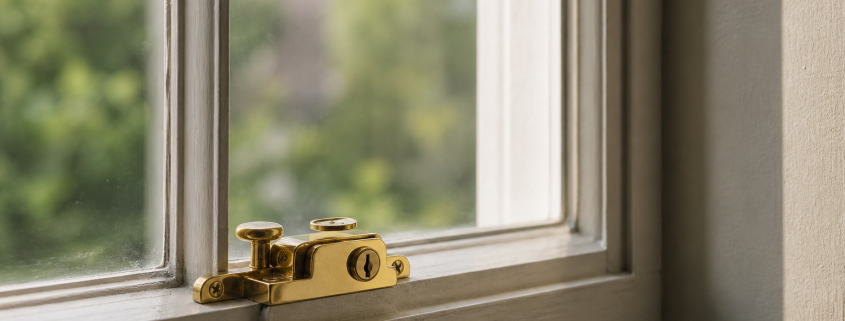
The classic Georgian window is the vertical sliding sash divided into small panes — most often a six-over-six arrangement (six panes in each sash). Glass technology of the period couldn’t produce large sheets, so windows were necessarily made up of many small panes held by slender glazing bars (astragals).
Those slender astragal bars are the signature of Georgian glazing. They’re far thinner than later Victorian bars, and preserving their delicacy is essential to authenticity — which is exactly why slim glazing matters so much on Georgian properties.
Proportion and Symmetry
Georgian architecture obeyed strict rules of proportion. Windows diminished in height up the floors, were arranged in rigid symmetry across the facade, and followed careful mathematical ratios. Getting these proportions right matters more than almost any other detail on a Georgian building.
Georgian sashes typically had no horns — the sash horn is a later Victorian development. Fitting horned sashes to a Georgian property is a subtle but real anachronism that informed observers notice.
Victorian Windows (1837-1901)
The Victorian era defined much of Britain’s housing stock, and its windows are among the most recognisable.
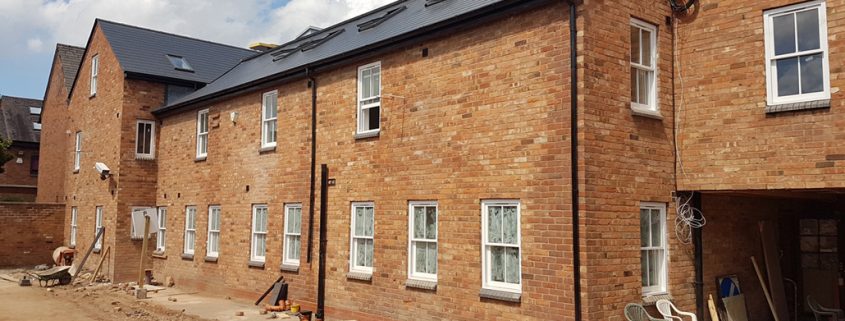
The Classic Sash
The dominant Victorian window is the vertical sliding sash. Early and mid-Victorian sashes often used multi-pane configurations, but as glass manufacturing improved, larger panes became fashionable.
The signature Victorian arrangement is the two-over-two sash — two panes in the upper sash, two in the lower, divided by a single vertical glazing bar. This became possible as sheet glass grew larger and cheaper, and it’s the configuration most people picture when they think “Victorian window.”
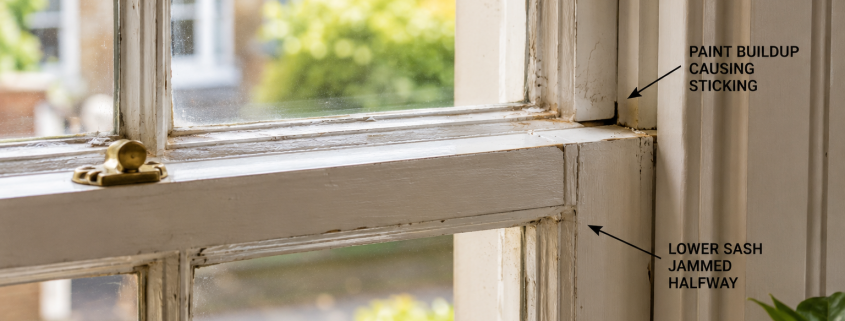
Sash Horns
A defining Victorian detail is the sash horn — the small projecting extension at the bottom corners of the upper sash. These appeared as larger, heavier panes of glass required stronger joints. They’re both functional and decorative, and their presence is a hallmark of authentic Victorian sashes.
Replacing Victorian sashes without sash horns is one of the most common authenticity mistakes. The horns are a small detail, but their absence reads as wrong to anyone familiar with the period.
Victorian Proportions
Victorian windows are typically tall and relatively narrow, emphasising verticality. The upper sash was often slightly shorter than the lower. Frames sat in reveals, recessed from the brick face — a detail that creates the characteristic shadow lines of a period facade.
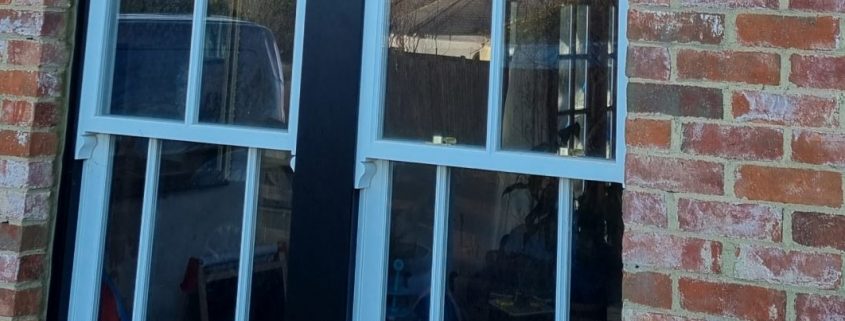
For genuine Victorian properties, vertically sliding timber sash windows in a two-over-two configuration, complete with horns, are almost always the correct choice.
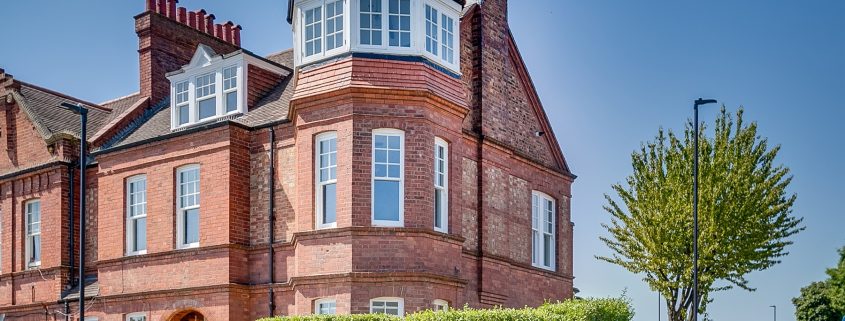
Edwardian Windows (1901-1910)
The Edwardian period brought a lighter, more decorative sensibility — and its windows reflect this shift.
Larger Glass, More Light
Edwardian homes generally have larger windows than their Victorian predecessors, letting in more light. The lower sash was frequently a single large pane, while the upper sash carried the decorative interest.
Decorative Top-Lights
The signature Edwardian feature is the multi-pane upper sash — often a six-pane or margin-light arrangement above a single-pane lower sash. These decorative top-lights might include coloured or leaded glass, creating a lighter, prettier composition than the austere Victorian two-over-two.
This “one-over-six” or “one-over-many” arrangement is distinctly Edwardian. The contrast between the plain lower sash and the decorative upper is the period’s calling card.
Bay Windows and Detailing
Edwardian houses frequently feature bay windows, often with elaborate timber detailing. The overall impression is more relaxed and decorative than the Victorian era — softer proportions, more glass, prettier glazing patterns.
1930s Windows (Interwar Period)
The interwar years saw a decisive break from the sliding sash tradition.
The Rise of the Casement
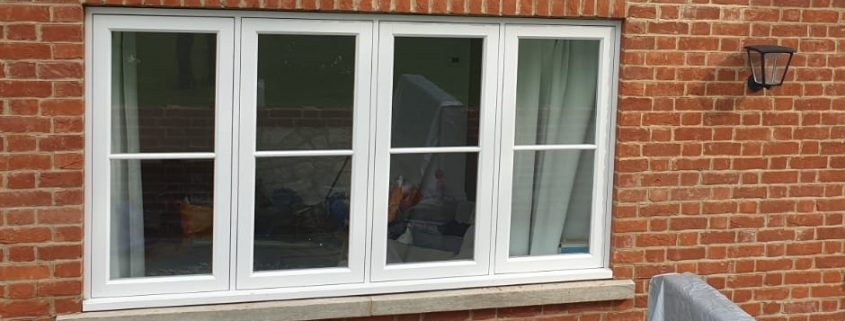
1930s housing — the era of the suburban semi — largely abandoned sash windows in favour of side-hung casements. These windows open outward on hinges rather than sliding vertically, and they define the look of interwar suburbia.
For genuine 1930s properties, timber casement windows are the authentic choice. Fitting sash windows to a 1930s semi is as much a mistake as fitting casements to a Victorian terrace.
Distinctive Glazing Patterns
The 1930s loved decorative glazing patterns. The sunrise (or sunburst) motif — radiating bars forming a fan or rising-sun pattern — is the era’s most iconic detail, often appearing in the upper portion of windows or in front doors.
Other common patterns include horizontal glazing bars, small-pane top-lights over larger clear panes, and geometric Art Deco influences. These patterns are a defining feature; plain glazing on a 1930s house misses the period’s character entirely.
Metal-Look and Leaded Lights
Many 1930s windows featured leaded lights — small diamond or rectangular panes held in lead cames. Timber casements with leaded or simulated leaded glazing capture this look while delivering modern performance.
Modern and Contemporary Windows
Post-war and contemporary homes call for a completely different approach.
Clean Lines and Large Glass
Modern architecture prizes light, openness, and minimal visual obstruction. Large panes of glass, slim frames, and few or no glazing bars suit these properties. The decorative divisions essential to a Victorian or Edwardian window would look fussy and wrong on a clean contemporary facade.
Flush and Minimal
For modern homes, flush casement windows with large unobstructed panes provide the clean lines the architecture demands. Where glazing bars are used, they tend to be minimal and structural rather than decorative.
The principle reverses from period properties: instead of adding authentic detail, you’re stripping it back. Simplicity is the goal.
The Common Mistakes
Understanding what goes wrong is as useful as knowing what’s right. These are the errors we see most often.
Wrong Glazing Pattern
The single most common mistake is the wrong glazing configuration for the era. Mock-Georgian bars (those uniform grids) get fitted to Victorian, Edwardian, and 1930s houses where they were never original. The result looks generic and historically confused.
Match the pattern to the period: two-over-two for Victorian, decorative top-lights for Edwardian, sunrise or geometric for 1930s, minimal for modern.
Incorrect Proportions
Even the right style fails if the proportions are off. Windows that are too wide, too short, or differently proportioned than the originals throw off the whole facade. The relationship between glass area, frame, and glazing bars matters enormously.
Where original windows survive elsewhere on the building or street, measure and match their proportions. Our guidance on measuring for sash windows helps get dimensions right.
Mismatched Materials
Fitting uPVC to a period property is the most jarring material mistake — the chunky profiles and plastic sheen never convince. Even where planning permits it, timber remains the authentic and superior choice for character homes. The grain, the paintable finish, and the slim profiles simply look right.
Chunky Sightlines
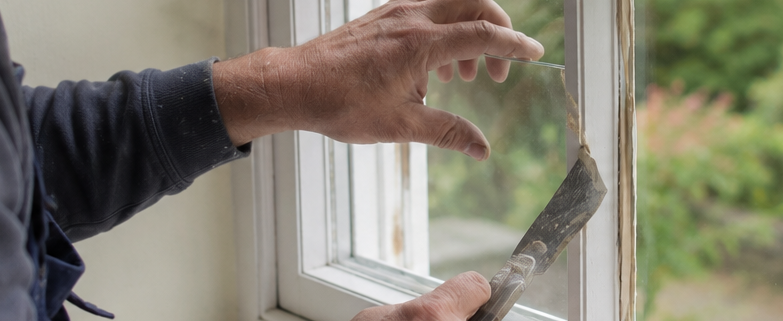
Standard double glazing forces heavier glazing bars, which thicken the delicate sightlines of period windows. For sensitive properties, slim glazing preserves authentic proportions. The width of a glazing bar might seem trivial, but it’s one of the details the eye registers immediately.
Ignoring the Reveal
Original windows often sat recessed from the brick face, creating shadow lines that contribute to a facade’s depth and character. Fitting replacements flush with the wall flattens the appearance. Maintaining the original reveal depth preserves this subtle but important quality.
Why Getting It Right Matters
Beyond aesthetics, correct windows protect your investment.
Character and Value
Sympathetic windows demonstrably support property value, particularly for period homes where buyers actively seek original character. Inappropriate windows can knock thousands off a sale price and put off the very buyers most drawn to a period property. Authentic detailing adds long-term value in a way that generic replacements never will.
Planning and Conservation
In conservation areas and on listed buildings, correct windows aren’t optional — they’re required. Getting the style, pattern, and proportions right is essential for approval, and incorrect installations can be enforced against. Understanding period detailing keeps you on the right side of planning rules.
A Coherent Whole
Most fundamentally, correct windows make a house feel complete. The proportions resolve, the detailing makes sense, and the building reads as the coherent design its architect intended. That sense of rightness is hard to quantify but immediately felt.
Frequently Asked Questions
How do I know what window style my house originally had?
Look at the best-preserved houses of the same age on your street — they’re your best reference. Original features on your own property, historic photographs, conservation area appraisals from your council, and estate agent listings of similar homes all help. The brick, roofline, and door style also indicate the era and its appropriate window conventions.
What’s the difference between Victorian and Edwardian windows?
Victorian sashes typically use a two-over-two pane arrangement with sash horns, emphasising tall narrow proportions. Edwardian windows are generally larger and lighter, often featuring a single-pane lower sash beneath a decorative multi-pane upper sash, sometimes with coloured or leaded glass. Edwardian style is prettier and more decorative; Victorian is more austere.
Are sash windows wrong for a 1930s house?
Generally, yes. 1930s housing predominantly used side-hung casement windows, often with distinctive glazing patterns like the sunrise motif. Fitting vertical sliding sashes to a 1930s semi is historically inaccurate — timber casements with period-appropriate glazing are the authentic choice for interwar properties.
Can I fit modern double glazing to a period property?
Yes, with care. Modern sealed units can be incorporated into authentic timber frames, though standard units may thicken glazing bars and affect sightlines. For sensitive or listed properties, slim double glazing preserves period proportions while delivering thermal performance. The key is maintaining the correct style and slender profiles.
What glazing pattern suits my Victorian terrace?
The classic Victorian configuration is two-over-two: two panes in the upper sash and two in the lower, divided by a single vertical glazing bar, with sash horns on the upper sash. Earlier Victorian properties sometimes used multi-pane arrangements, so check surviving originals on your street to confirm what’s correct for your specific period.
How can I tell if my house is Georgian rather than Victorian?
Georgian properties (1714-1837) typically have small-pane sashes — often six-over-six — with very slender glazing bars and no sash horns, arranged in strict symmetry. Victorian sashes (1837-1901) usually have fewer, larger panes (commonly two-over-two) and feature sash horns. Georgian facades follow rigid proportional rules; Victorian design is often more varied and decorative.
Does matching window style really affect property value?
Yes, particularly for period homes. Buyers of character properties actively seek authentic features, and inappropriate windows — wrong style, chunky uPVC, incorrect proportions — can reduce value and deter buyers. Sympathetic timber windows that match the architecture support and protect a period home’s value.
Conclusion
Matching windows to architecture comes down to reading your home’s era and respecting its conventions. Georgian properties want delicate six-over-six sashes with slender bars and no horns; Victorian properties want two-over-two sashes with horns; Edwardian homes suit decorative top-lights; 1930s houses call for casements with period glazing patterns; modern buildings demand clean, minimal lines.
Avoid the common traps — wrong glazing patterns, incorrect proportions, mismatched materials, and chunky sightlines — and your replacement windows will look like they belong. The details that seem minor (a sash horn, a glazing bar’s width, a recessed reveal) are exactly what the eye registers.
Get them right and the reward is a home that feels complete, commands its full value, and satisfies any conservation requirements. Whatever the era of your home, the windows should look as though they were always meant to be there. We make bespoke timber windows matched to every period of British architecture — send us your details and we’ll help you get the style and proportions right.