
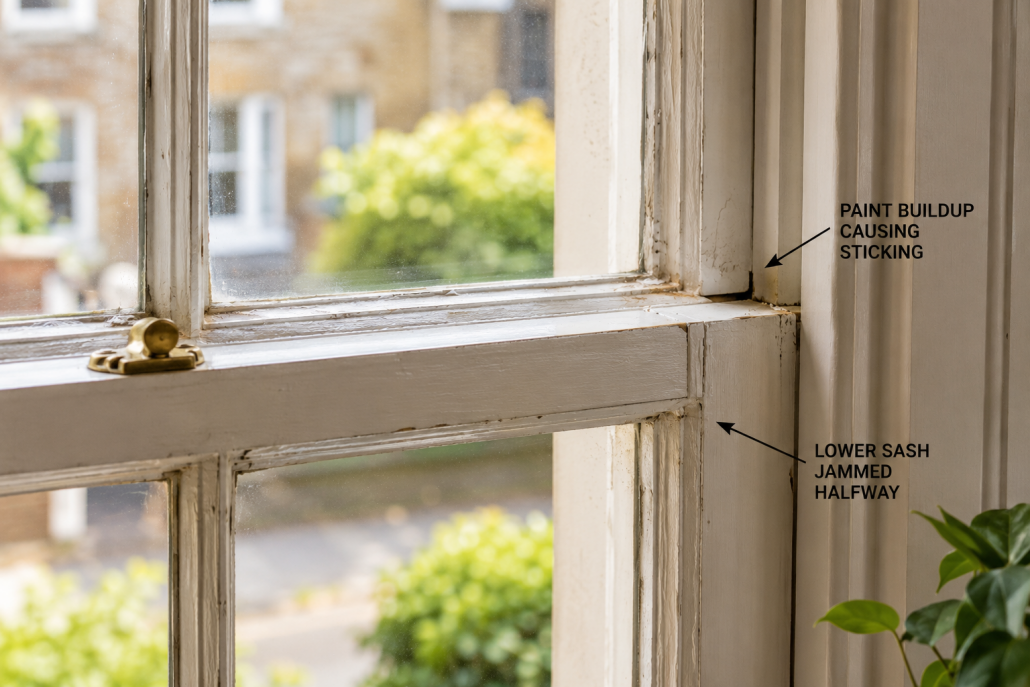
How to Fix Sticking Sash Windows
In this article, you’ll discover:
- The four common causes of sticking sash windows
- Why paint buildup accounts for most stuck windows
- Step-by-step fixes for each cause
- How to deal with swollen timber and humidity
- Simple maintenance that prevents sticking returning
- When the problem needs a professional
Introduction
A sash window that won’t budge is one of the most common complaints with traditional timber windows — and one of the most fixable. Before you assume the worst and start pricing up replacements, know this: the vast majority of sticking sashes are caused by something trivial.
Paint buildup alone accounts for roughly 80% of stuck sash windows. Decades of repainting without proper preparation gradually glue the sash to its frame. The fix is straightforward and costs almost nothing.
The rest usually come down to swollen timber, worn cords, or minor misalignment — all manageable with basic tools and a bit of patience.
We manufacture and restore timber sash windows, and we’ve freed countless stuck sashes over the years. This guide walks through diagnosing and fixing the problem yourself.
Why Sash Windows Stick: The Four Causes
Before reaching for tools, work out what’s actually wrong. Each cause has a different fix.
1. Paint Buildup (Around 80% of Cases)
This is the big one. Every time a window gets repainted without the sash being moved or the edges being cut back, a little more paint bridges the gap between sash and frame. Over decades, these layers fuse the sash to the staff beads and parting bead.
You’ll recognise it by thick, cracked paint along the edges where sash meets frame — and often a window that hasn’t been opened in years.
2. Humidity and Swollen Timber
Timber absorbs moisture and expands. In damp conditions — wet winters, bathrooms, kitchens — a sash can swell just enough to bind in its frame. This kind of sticking often comes and goes with the seasons, easing in dry summer months and returning in winter.
3. Worn or Broken Sash Cords
If a sash drops, jams at an angle, or feels unbalanced, the cords may be worn or broken. A snapped cord lets the sash sit unevenly, catching against the frame. This is a different problem with its own solution — full cord replacement.
4. Misaligned Sashes or Beads
Sometimes the staff beads (the inner mouldings holding the lower sash) have been refitted too tightly, or the sash has shifted in its frame. The result is excess friction that makes operation stiff even without paint or swelling.
Fixing Paint Buildup
Since this causes most sticking, start here.
What You’ll Need
A craft knife or paint scraper, a stiff putty knife or thin filling knife, sandpaper (medium and fine grade), a hammer and a thin timber wedge or old chisel, and candle wax or a proprietary sash lubricant.
Step 1: Break the Paint Seal
Run a sharp craft knife firmly along the joint between the sash and the frame on both the inside and outside. You’re cutting through the paint film that’s bridging the gap. Work the full length of both vertical edges where the sash meets the beads.
Step 2: Ease the Sash Free
Gently work a thin putty knife or wedge into the joint and apply steady pressure. Don’t force it or hammer hard — you risk splitting the beads or cracking glass. Work along the length, easing a little at a time. The sash should gradually release.
If the lower sash still won’t move, you may need to carefully prise off a staff bead to free it (score the paint line first to avoid tearing).
Step 3: Clean the Runs
With the sash free, scrape and sand the painted surfaces in the channels (the runs) where the sash slides. Remove built-up paint down to a smooth surface. Don’t strip back to bare timber unless necessary — just remove the excess that’s causing friction.
Step 4: Lubricate
Rub candle wax or apply a sash lubricant to the cleaned runs and the sash edges. This dramatically reduces friction and helps prevent the problem returning. Avoid oil-based lubricants on painted surfaces — wax works better and doesn’t attract dirt.
Step 5: Test and Refit
Slide the sash up and down several times to confirm smooth operation. Refit any beads you removed, taking care not to over-tighten them against the sash.
Dealing with Swollen Timber
If humidity is the culprit, the approach is different.
Identify the Binding Point
Open the window as far as it will go and look for shiny, compressed, or marked areas on the sash edges — these show where the timber is rubbing. Often it’s just one localised spot, not the whole edge.
Light Planing or Sanding
Where a swollen area binds, remove a small amount of timber with a sharp plane or coarse sandpaper. Take off the minimum needed — you can always remove more, but you can’t put it back. Aim for a 2-3mm clearance between sash and frame.
Once you’ve planed bare timber, prime and repaint the exposed area to seal it against future moisture. Unsealed timber will simply absorb water and swell again.
Address the Underlying Damp
Planing treats the symptom. If condensation or damp is causing repeated swelling, improving ventilation and heating will do more than repeated planing. Persistent moisture also accelerates timber decay, so it’s worth resolving properly.
Replacing Worn Sash Cords
If the sticking is caused by cord failure, no amount of cleaning or planing will help.
A worn cord lets the sash hang unevenly, catching against the frame. A broken one means the sash won’t stay open at all. The fix is full cord replacement — removing the sashes, accessing the weight pockets, and fitting new waxed cotton cord.
This is a more involved job, but well within DIY capabilities. If your sashes use weights rather than spring balances, our guidance on choosing weights or springs explains the systems. Replacement sash weights are available if yours are missing or incorrect after previous work.
Fixing Misaligned Beads
If beads have been refitted too tightly, the fix is simple.
Carefully prise off the offending staff bead, then refit it with a fraction more clearance — a business card’s thickness is often enough. The sash should slide freely without the bead being so loose that the window rattles.
Take care with the hardware and fittings while you work. Old fasteners and pulleys can be brittle, and forcing them risks damage.
Preventing Sticking from Returning
A little maintenance keeps sashes moving freely.
Open and close each sash a few times every couple of months — windows that never move are the ones that seize. When repainting, always cut the sash free afterwards and never paint the running surfaces in the channels. Keep the runs lightly waxed, and address any damp or condensation promptly before it swells the timber.
Regular maintenance is far less effort than freeing a sash that’s been painted shut for a decade. For older and historic sashes, Historic England’s advice on traditional windows is worth reading before you start work.
When to Call a Professional
Most sticking is straightforward DIY, but some situations warrant expert help.
Consider a professional if the timber shows significant rot or decay (the window may need repair beyond freeing the sash), the sash cords and weights need replacing and you’re not confident dismantling the window, the glass is loose or cracked and at risk during the work, or the window is large, heavy, or at height where safe handling is difficult.
Professional sash window repair typically costs £80-200 depending on the work involved. For windows beyond economic repair, replacement timber windows with modern spring balances eliminate the cord-related causes of sticking entirely.
Frequently Asked Questions
Why has my sash window suddenly stopped opening?
The most likely cause is paint buildup that has finally bridged the gap between sash and frame — this accounts for around 80% of stuck sashes. If the window worked recently, swollen timber from damp weather is another common cause. A sudden drop or angle suggests a broken sash cord. Diagnose before applying force.
Can I fix a sticking sash window without removing it?
Often yes. Paint-related sticking can usually be fixed in place by cutting the paint seal, easing the sash free, cleaning the runs, and lubricating. Swollen timber can be lightly planed where it binds. Only cord replacement and major misalignment require removing the sash from the frame.
What’s the best lubricant for sash windows?
Candle wax or a dedicated sash lubricant works best on the running surfaces. Avoid oil-based products on painted surfaces — they attract dirt and can go gummy. Wax reduces friction effectively without making a mess, and a quick application every year or two keeps sashes sliding smoothly.
How do I stop my sash windows sticking in winter?
Winter sticking usually means the timber is absorbing moisture and swelling. Improve ventilation and heating to reduce indoor humidity, ensure exposed timber is properly sealed with paint, and address any condensation issues. Where a specific spot binds, light planing followed by repainting the bare area prevents it reabsorbing moisture.
Is it worth repairing old sash windows or should I replace them?
If the timber is sound, repair is almost always worthwhile — sticking is usually a cheap, simple fix and original sashes have character that’s hard to replicate. Replacement makes sense only when timber is extensively rotten or the windows are beyond economic repair. Many century-old sash windows have decades of life left in them.
Conclusion
A sticking sash window is rarely the disaster it feels like. Eight times out of ten it’s paint buildup — a problem solved with a sharp knife, some patience, and a rub of wax. Swollen timber, worn cords, and tight beads cover most of the rest, and all are manageable with basic DIY skills.
Diagnose before you force anything. Freeing a sash with care preserves the window; forcing it risks splitting beads and cracking glass. And once it’s moving freely, a little routine maintenance keeps it that way.
If your sash windows need more than freeing — or you’re weighing repair against replacement — get in touch for a free quote and we’ll give you an honest assessment.


Leave a Reply
Want to join the discussion?Feel free to contribute!