Draught Proofing Timber Sash Windows

Draught Proofing Timber Sash Windows

In this article, you’ll discover:

  • Why sash windows draught and where the gaps are
  • Three draught-proofing methods compared
  • Realistic costs for DIY and professional options
  • The energy savings you can realistically expect
  • How to draught-proof without spoiling authentic character
  • Which method suits your windows and budget

Introduction

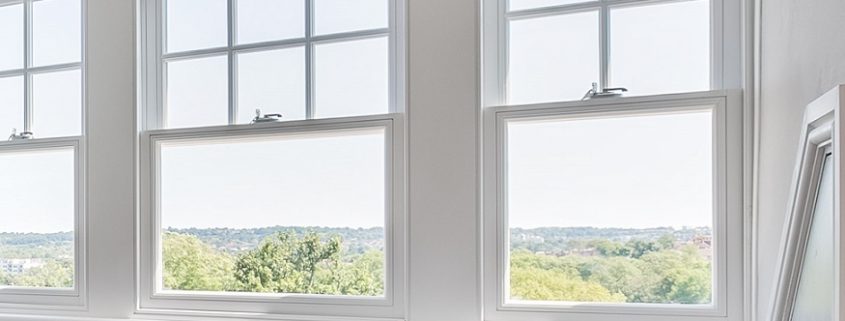
Traditional timber sash windows are beautiful, but few of them are airtight. The sliding mechanism that makes them so elegant leaves small gaps: around the sashes, between the meeting rails, and where the frame meets the wall. On a windy day, you can feel the result.

The good news is that draught-proofing a sash window doesn’t mean sacrificing its character or its ability to open. Done well, it’s invisible, it keeps the window fully operational, and it can save £50-100 a year in a typical semi while making rooms noticeably more comfortable.

This guide compares the three main methods, what they cost, and how to choose — whether you’re draught-proofing original sash windows or specifying new ones.

Why Sash Windows Draught

Understanding where the air gets in helps you target the fix.

A sliding sash window has several potential gaps. The sashes need clearance to slide, so there’s a gap between each sash and the frame’s runs. Where the top and bottom sashes meet in the middle — the meeting rails — there’s another potential leak. Air also escapes around the perimeter where the box frame meets the masonry, and through the pulley holes on corded windows.

Add these together and an un-draughted sash window can be a significant source of heat loss. It’s rarely one big gap; it’s the sum of many small ones.

The Three Main Methods

There are three established approaches, ranging from simple DIY to more involved professional work. Each has its place.

1. Brush Seals (DIY-Friendly)

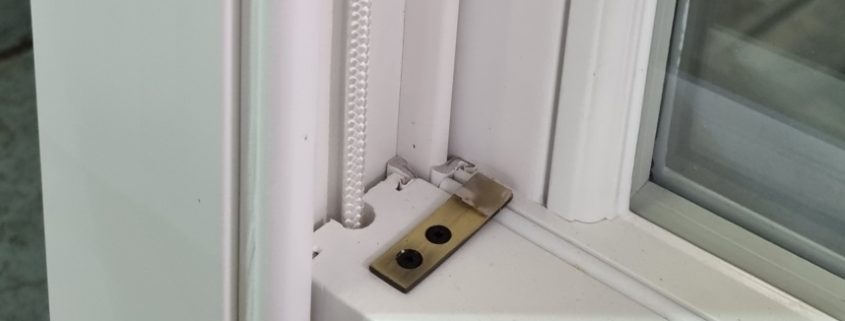
Brush seals, also called pile seals, are strips of dense brush that fit into the runs and against the meeting rails. As the sash slides, the brush maintains contact and blocks the draught while still allowing smooth movement.

They’re the most accessible option: available as self-adhesive strips or timber-mounted versions, and fittable by a competent DIYer for around £15-25 per window in materials. Brush seals are unobtrusive, don’t stop the window operating, and make a real difference for minimal outlay.

The trade-off is that brush seals are less airtight than compression seals and wear over time, needing replacement every several years. For most homes, though, they’re an excellent first step.

2. Compression Seals (Professional)

Compression seals use flexible gaskets, often wiper or bulb seals routed into the timber, that the sash presses against when closed. They seal more completely than brush seals, particularly at the meeting rails.

This is usually professional work, as it involves routing channels into the sashes and frame for a concealed, durable result. Expect to pay roughly £200-350 per window for professional draught-proofing of this kind, often including refurbishment of the window’s operation at the same time.

The payoff is a more thorough, longer-lasting seal that’s invisible when the window is closed. For period properties where you want maximum performance without altering appearance, this is often the best route.

3. Secondary Glazing

Secondary glazing takes a different approach entirely: rather than sealing the original window, it adds a discreet independent pane on the inside, creating a sealed air gap.

It’s the most effective option for both draughts and noise: the sealed inner pane blocks air infiltration comprehensively and the wide air gap dampens sound. Costs vary with size and specification but typically fall around £300-600 per window.

Secondary glazing leaves the original window completely untouched, which makes it particularly valuable for listed buildings where altering the historic sash isn’t permitted. The downside is a second pane to open for ventilation and cleaning. It also improves thermal performance closer to that of modern double glazing without replacing the original glass.

Comparing the Options

Each method trades cost against effectiveness and permanence.

Brush seals are cheapest and DIY-friendly, delivering a solid improvement for £15-25 per window, the sensible starting point for most people. Compression seals cost more (£200-350) and need a professional, but seal more completely and last longer. Secondary glazing is the priciest (£300-600) but the most effective, and the only option that also seriously tackles noise — ideal where the original window must stay untouched.

There’s no single “best”; it depends on your budget, how much draught you’re fighting, and whether the window can be altered.

The Energy Savings

Draught-proofing pays back. In a typical semi-detached house, sealing draughty sash windows can save around £50-100 per year on heating, according to widely cited energy efficiency figures.

The comfort improvement is often the bigger win. Eliminating draughts removes the cold spots and chilly air movement that make rooms feel colder than the thermostat suggests — often letting you turn the heating down a notch without noticing. For independent guidance on the savings, the Energy Saving Trust publishes figures on draught-proofing across the home.

Keeping the Character

The best draught-proofing is the kind you can’t see. All three methods, done properly, preserve a sash window’s authentic appearance.

Brush and compression seals are concealed within the runs and rails, invisible from outside and barely noticeable inside. Secondary glazing sits behind the original window and, when slim and well-fitted, is discreet. None of these methods stops the window opening — you keep the full function of a working sash, just without the draught.

This is where draught-proofing beats replacement for many period homes: you retain the original windows and their character while solving the comfort problem. For properties where original joinery is worth keeping, it’s often the smarter choice.

When to Consider Replacement Instead

Draught-proofing is ideal for sound windows with good timber. But if the sashes are rotten, the frames are failing, or the windows are beyond economical repair, sealing draughts is only patching a bigger problem.

In that case, new bespoke timber sash windows with modern draught seals and double glazing built in may be the better long-term investment — combining authentic looks with contemporary performance from the start.

Frequently Asked Questions

How much does it cost to draught-proof sash windows?

It depends on the method. Brush seals cost around £15-25 per window as a DIY job. Professional compression seals run £200-350 per window and seal more completely. Secondary glazing costs roughly £300-600 per window and is the most effective, also reducing noise. Choose based on your budget and how much draught you’re tackling.

Will draught-proofing stop my sash windows opening?

No. All the main methods (brush seals, compression seals, and secondary glazing) are designed to keep the window fully operational. Brush and compression seals maintain contact as the sash slides, and secondary glazing simply adds an openable inner pane. You keep a working sash window, just without the draught.

How much can I save by draught-proofing sash windows?

In a typical semi-detached house, draught-proofing sash windows can save around £50-100 per year on heating. The comfort improvement is often the bigger benefit — removing draughts eliminates cold spots and can let you lower the thermostat slightly without feeling colder.

Does draught-proofing spoil the look of period windows?

Not when done properly. Brush and compression seals are concealed within the runs and meeting rails, invisible from outside. Secondary glazing sits discreetly behind the original window. All three preserve the authentic appearance while solving the draught — a key advantage over full replacement for period homes.

Is draught-proofing better than replacing sash windows?

For sound windows with good timber, yes — it’s cheaper, retains original character, and solves the comfort problem. But if the sashes are rotten or the frames are failing, draught-proofing only patches a deeper issue. In that case, new bespoke timber sash windows with built-in seals and double glazing are the better long-term choice.

Conclusion

Sash windows draught because they slide — but that doesn’t mean you have to live with cold rooms or replace beautiful original joinery. Brush seals fix the worst of it for £15-25 a window; compression seals go further for £200-350; and secondary glazing tackles both draughts and noise for £300-600, without touching the original window.

Whichever you choose, the result is a warmer, quieter room, savings of around £50-100 a year, and a sash window that still looks and works exactly as it should. For sound windows, it beats replacement on both cost and character.

If your sashes are past saving — or you’d like new ones with draught-proofing built in — tell us what you’re working with and we’ll point you to the right option.
modern timber windows

Modern Timber Windows: Contemporary Designs

In this article, you’ll discover:

  • How modern timber windows differ from traditional designs
  • The slim sightlines and large glass areas defining contemporary style
  • Pivot, tilt-turn, and handleless mechanisms explained
  • Timber-aluminium composite windows and their advantages
  • What contemporary timber windows cost (£800-1,500 per m²)
  • Whether timber suits a modern architectural home

Introduction

Timber windows are usually associated with period properties — sash windows on Victorian terraces, casements on cottages. But some of the most striking windows on contemporary homes are also made of wood. Modern timber design has moved a long way from heritage styling.

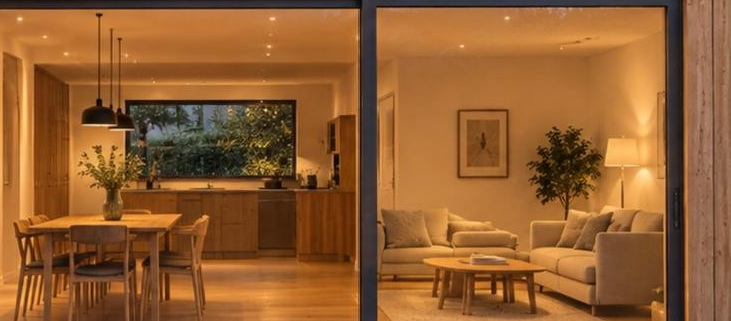
Today’s architectural timber windows are about light and minimalism: expanses of glass, frames slimmed to the structural minimum, and clean lines with no decorative fuss. They deliver the warmth and sustainability of timber with an aesthetic that suits new-builds, extensions, and bold renovations.

This guide covers what defines a modern timber window, the mechanisms and materials involved, and what to expect on cost. Whether you’re building from scratch or reimagining an older home, these timber windows show how far the material has come.

What Makes a Timber Window “Modern”?

The defining principle is the opposite of period design. Where a Victorian window celebrates division and detail, a modern window minimises both.

Large Glass Areas

Contemporary design prioritises light. Modern timber windows push the glazing to 70% or more of the window area, maximising daylight and views. The glass, not the frame, is the feature. This suits open-plan interiors and homes designed around their connection to the outside.

Slim Sightlines

The frame is pared right back. Traditional timber windows have sightlines (visible frame width) of 100mm or more; modern designs slim this to around 50-60mm. The frame recedes, leaving an uninterrupted plane of glass. Achieving this while maintaining strength is where quality engineering shows.

Minimal Frames and Clean Lines

No glazing bars, no decorative mouldings, no horns — modern timber windows strip away the ornamentation that defines period styles. The result is a clean, geometric look that complements contemporary architecture. Where a period window wants authentic detail, a modern one wants none at all.

Contemporary Opening Mechanisms

Modern timber windows aren’t limited to traditional side-hung casements. Several mechanisms suit contemporary designs.

Tilt-Turn

Tilt-turn windows do two things with one handle: tilt inward from the top for secure ventilation, or swing fully open inward like a door for cleaning and maximum airflow. They’re a popular contemporary choice — versatile, easy to clean from inside, and well-suited to larger openings.

Pivot

Pivot windows rotate around a central axis, horizontal or vertical. The effect is dramatic and architectural, ideal for feature windows where the movement itself is part of the design. They handle large, heavy glazed panels elegantly.

Handleless Designs

For the cleanest possible look, handleless mechanisms operate through discreet catches or push-to-open hardware, removing the visual interruption of a handle entirely. It’s minimalism taken to its conclusion — nothing on the glass but glass.

Timber-Aluminium Composite Windows

One of the most significant developments in modern window design is the timber-aluminium composite.

How They Work

These windows combine a timber interior with an aluminium exterior cladding. You get the warmth, character, and natural feel of wood inside, and a weatherproof, low-maintenance aluminium skin outside that takes the brunt of the elements.

The Advantages

The composite approach offers the best of both materials. The aluminium exterior needs virtually no maintenance and never needs repainting, while the timber interior keeps the sustainability and aesthetic benefits of wood. Slim sightlines are easier to achieve, and the aluminium can be powder-coated in almost any colour for a crisp, contemporary exterior.

For homeowners who love timber inside but want minimal external upkeep, composites are an increasingly popular answer — particularly on exposed or hard-to-access elevations.

Thermal Performance

Modern timber windows aren’t just about looks — they perform. Timber is a natural insulator, and contemporary units pair it with high-performance glazing.

Large glass areas make the glazing specification critical. Quality double or triple glazing with low-E coatings and argon fill delivers excellent U-values — comfortably meeting Building Regulations Part L (1.4 W/m²K maximum) and often far exceeding it. With large expanses of glass, specifying good glazing matters even more than on a small window, since the glass dominates the thermal performance.

What Modern Timber Windows Cost

Contemporary timber windows sit at the premium end, reflecting the engineering and materials involved.

Expect roughly £800-1,500 per square metre, depending on specification. The range is driven by the opening mechanism (pivot and tilt-turn cost more than fixed or casement), the glazing (triple glazing and specialist coatings add cost), whether it’s solid timber or timber-aluminium composite, and the size and complexity of the units.

Large architectural glazing is a significant investment — but for a contemporary home where the windows are a defining feature, it’s often central to the design rather than an afterthought. The long-term value of quality windows also helps justify the outlay.

Does Timber Suit a Modern Home?

Yes, and increasingly architects specify it deliberately.

Timber brings warmth to contemporary interiors that can otherwise feel cold, and its sustainability credentials align with the environmental priorities of modern building. A responsibly sourced timber window has a far lower carbon footprint than uPVC or aluminium alternatives.

The old assumption that modern means synthetic is fading. For a contemporary home that values natural materials, low environmental impact, and genuine quality, modern timber windows are a compelling — and beautiful — choice.

Frequently Asked Questions

Can timber windows look modern?

Yes. Modern timber windows feature large glass areas (70%+ glazing), slim sightlines of 50-60mm, minimal frames, and no decorative detailing. Combined with contemporary mechanisms like tilt-turn or pivot, they suit new-builds, extensions, and bold renovations. Timber-aluminium composites take the contemporary look further with crisp powder-coated exteriors.

What are timber-aluminium composite windows?

They combine a timber interior with an aluminium exterior cladding. You get the warmth and sustainability of wood inside, and a weatherproof, virtually maintenance-free aluminium skin outside that never needs repainting. Composites make slim sightlines easier to achieve and allow almost any exterior colour — ideal for contemporary homes.

How much do modern timber windows cost?

Roughly £800-1,500 per square metre, depending on specification. Cost is driven by the opening mechanism (pivot and tilt-turn cost more), glazing choice (triple glazing adds cost), solid timber versus composite construction, and unit size and complexity. Large architectural glazing is a premium investment central to contemporary design.

Are modern timber windows energy efficient?

Very. Timber is a natural insulator, and modern units pair it with high-performance double or triple glazing, low-E coatings, and argon fill. They comfortably meet Building Regulations Part L (1.4 W/m²K) and often exceed it. With large glass areas, the glazing specification is the key driver of overall thermal performance.

What opening mechanisms suit contemporary timber windows?

Tilt-turn (tilts for ventilation or swings fully open inward), pivot (rotates around a central axis for a dramatic architectural effect), and handleless designs (discreet catches for the cleanest look) all suit modern homes. The choice depends on the window’s size, position, and the aesthetic you’re after.

Conclusion

Modern timber windows prove that wood belongs on contemporary homes as much as period ones. Large glass areas, 50-60mm sightlines, minimal frames, and mechanisms like tilt-turn and pivot deliver a clean architectural aesthetic — while timber-aluminium composites add crisp, maintenance-free exteriors.

At £800-1,500 per square metre they’re a premium choice, but for a home where windows are a defining feature, they combine natural warmth, strong thermal performance, and genuine sustainability in a way synthetic materials can’t match.

If you’re designing a contemporary home or extension and want to explore what modern timber can do, share your plans with us and we’ll help you shape the right specification.

warm edges

Warm Edge Spacers vs Aluminium: Which Is Better?

In this article, you’ll discover:

  • What a spacer bar actually does in a double-glazed unit
  • How warm edge spacers differ from traditional aluminium
  • The real-world impact on condensation and U-values
  • What the upgrade costs (£30-50 per window)
  • Whether it’s worth it for your situation

Introduction

Most people choosing double glazing focus on the glass and the frame. The spacer bar — the thin strip that holds the two panes apart — rarely gets a mention. Yet it has a direct bearing on two things homeowners complain about most: condensation around the edge of the glass, and rooms that never quite feel warm.

Aluminium was the industry standard for decades. It is cheap, strong, and holds the panes at the right distance. Its weakness is that it conducts heat readily, which is the last thing you want at the edge of an insulating unit. Warm edge spacers were developed to close that gap in performance.

This guide sets out the practical difference between the two, what it means for condensation and heat loss, and whether the modest upgrade cost is worth paying on your timber windows.

What Does a Spacer Bar Do?

Every double-glazed sealed unit has two panes of glass held apart by a spacer bar around the perimeter. That gap is what creates the insulating cavity, usually filled with argon gas.

The spacer does three jobs: it maintains the precise gap between panes, it holds the desiccant that keeps the cavity dry (preventing internal misting), and it forms part of the edge seal that keeps the gas in and moisture out.

It sounds minor. But because the spacer sits right at the edge where the warm interior meets the cold exterior, the material it’s made from has a real effect on performance.

The Problem with Aluminium

Aluminium is an excellent conductor of heat. In a spacer bar, that’s a liability.

Around the edge of the glass, an aluminium spacer creates a cold bridge — a path that lets heat escape and cold creep in. This chilled edge is why you so often see condensation forming first around the perimeter of a window on cold mornings. The glass edge is colder than the centre, so moisture condenses there.

Aluminium spacers still work, and they’re perfectly serviceable. But that cold edge drags down the overall thermal performance and makes edge condensation more likely.

How Warm Edge Spacers Are Different

Warm edge spacers replace some or all of the metal with less conductive materials — typically structural foam, stainless steel, or composite polymers. These conduct far less heat than aluminium.

The result is a warmer glass edge. That single change delivers two measurable benefits.

Reduced Condensation

Because the inner edge of the glass stays warmer, moisture is far less likely to condense there. In practice, warm edge spacers can cut edge condensation by around 40% compared with aluminium — a noticeable difference in bedrooms, bathrooms, and other rooms prone to morning misting. If condensation is a recurring annoyance, this is the upgrade that targets it directly.

Better U-Value

A warmer edge also improves the whole window’s insulation. Warm edge spacers can improve the overall U-value by roughly 0.2 W/m²K compared with aluminium. It’s not dramatic on its own, but combined with quality low-E glass and a well-built engineered timber frame, it helps push a window comfortably past Building Regulations requirements.

What It Costs

Warm edge spacers are an inexpensive upgrade. Expect to pay roughly £30-50 more per window than standard aluminium spacers.

For a modest sum per unit, you get reduced condensation and a small but real thermal improvement — for the entire life of the window. There’s no maintenance, no downside in appearance (the spacer is available in colours to match your frames), and nothing to go wrong.

Is It Worth It?

For most people, yes.

The upgrade makes the clearest difference in condensation-prone rooms — bathrooms, kitchens, bedrooms, and any north-facing room that tends to mist up. If you’ve battled edge condensation before, warm edge spacers directly address the cause rather than the symptom.

Even in less humid rooms, the modest cost and lasting thermal benefit make warm edge the sensible default on new timber double glazed windows. Given the small premium, there’s little reason to specify aluminium on a quality window you expect to last decades.

The one situation where aluminium might be fine: internal windows, or budget projects where every pound counts and condensation isn’t a concern. Otherwise, warm edge earns its keep.

Frequently Asked Questions

What is a warm edge spacer?

A warm edge spacer is the bar around the perimeter of a double-glazed unit, made from low-conductivity materials such as structural foam, stainless steel, or composite polymers instead of aluminium. By conducting less heat, it keeps the glass edge warmer, reducing condensation and slightly improving the window’s overall insulation.

Do warm edge spacers really reduce condensation?

Yes. Because they keep the inner glass edge warmer than aluminium does, moisture is far less likely to condense around the perimeter. Warm edge spacers can reduce edge condensation by around 40% — most noticeable in bathrooms, bedrooms, and rooms that tend to mist up on cold mornings.

How much do warm edge spacers cost?

Typically £30-50 more per window than standard aluminium spacers. It’s a modest, one-off upgrade with no ongoing maintenance, delivering reduced condensation and a small thermal improvement for the entire life of the window.

Are warm edge spacers worth it?

For most homes, yes — especially in condensation-prone rooms. The cost is low, the condensation reduction is meaningful, and the U-value improvement (around 0.2 W/m²K) is a useful bonus. Aluminium may suffice for internal windows or tight budgets, but warm edge is the sensible default for quality timber windows.

Conclusion

The spacer bar is a small detail with a real effect. Aluminium works, but its cold edge invites condensation and leaks a little heat. Warm edge spacers fix both for a modest £30-50 per window — cutting edge condensation by around 40% and nudging the U-value in the right direction.

For any room prone to misting, and for quality windows you expect to keep for decades, it’s an easy call. If you’re specifying new timber windows and want to know whether warm edge is right for your rooms, drop us a line and we’ll talk it through.

Window Installation

Supply Only Timber Windows: Is DIY Installation Worth It?

In this article, you’ll discover:

  • What “supply only” actually means and who it suits
  • The carpentry skills DIY window fitting really demands
  • The tools you’ll need and what they cost (£300-500)
  • Realistic savings versus the risks of getting it wrong
  • How Building Regulations and warranties complicate DIY
  • An honest verdict on when DIY makes sense — and when it doesn’t

Introduction

Supply only is tempting. You buy the windows, fit them yourself, and pocket the money you’d have paid an installer, often 30-40% of the total project cost. For a competent DIYer, that’s a serious saving.

But window installation isn’t shelf assembly. Get it right and you save a meaningful sum. Get it wrong and you face draughts, leaks, jammed sashes, voided warranties, and potentially a Building Regulations headache when you sell.

We supply timber windows nationwide on a supply-only basis, so we’ve seen both outcomes: the confident carpenter who fits a flawless run of casements, and the optimistic beginner who calls us three days in. This guide gives you an honest basis to decide which you’re likely to be.

What “Supply Only” Means

Supply only is exactly what it sounds like: we manufacture your bespoke windows to precise measurements and deliver them, but installation is down to you (or a fitter you arrange separately).

It’s the opposite of a “supply and fit” service, where the same company measures, makes, and installs. Supply only puts you in control of the fitting — and responsible for it.

Who It Suits

Supply only makes most sense for experienced tradespeople, seasoned DIYers with solid carpentry skills, builders managing their own projects, and landlords or developers with in-house teams. If you fall into one of those groups, the savings are real and the process is manageable.

It’s a poor fit for anyone whose DIY experience stops at flat-pack furniture and shelving. Window fitting is structural, weather-critical work, a different order of difficulty.

The Skills You Actually Need

The skill level involved is worth being clear about. Window installation sits at intermediate carpentry and above: not expert work, but well beyond beginner.

You need to be comfortable with accurate measuring (to the millimetre), working with levels and packers to get a frame plumb and square, cutting and fitting timber sub-frames or sills where needed, applying sealants and weatherproofing correctly, and handling heavy, awkward units safely — often at height.

You also need to understand why each step matters. A frame that’s a couple of millimetres out of square will bind the sashes. A poorly sealed perimeter will let water in. These aren’t cosmetic issues — they compromise the window’s function and lifespan.

The Honest Test

Ask yourself: have you hung a door so it closes cleanly on the latch every time? Fitted a kitchen with level, aligned units? If yes, you likely have the baseline skills. If those jobs would daunt you, window fitting will too.

Tools Required

Fitting windows properly needs a decent kit. If you don’t already own most of it, budget £300-500 for the outlay.

The essentials include a good spirit level (ideally two, a long and a short), a drill/driver and appropriate fixings, packers and shims, a mitre or hand saw for any timber trimming, a caulking gun and quality sealants, a mallet, chisels, and a tape measure you trust. For upper floors you’ll also need safe access — scaffold tower or secure ladders.

Factor this into your savings calculation. If you’re buying tools for a single project, the £300-500 eats into the money you’re saving by not paying a fitter.

The Savings in Practice

The appeal is straightforward once you put numbers to it. Professional installation typically accounts for 30-40% of a window project’s total cost, which on a whole-house replacement can run to thousands.

Fitting them yourself captures that saving directly. On a project where installation would cost £3,000, a competent DIY job keeps most of that in your pocket — minus the tool outlay and your own time.

But be realistic about time. A professional fits windows daily and works fast. A capable DIYer should expect to take two to three times longer per window. What a fitter does in a day might take you a long weekend. That’s fine if you enjoy the work and value the saving — but factor your time in honestly.

The Risks and Pitfalls

This is where supply-only DIY needs a clear-eyed view. The savings are real, but so are the ways it can go wrong.

Warranty Complications

This is the big one. Many manufacturers’ guarantees depend on correct installation. Fit the windows incorrectly and you can void the product warranty — leaving you unprotected if a problem develops. Always check the warranty terms before you commit to self-installation. Our guidance on timber window maintenance assumes correct fitting as the starting point.

Building Regulations Compliance

Replacement windows must comply with Building Regulations: principally thermal performance (U-value of 1.4 W/m²K maximum), plus ventilation and, where relevant, fire escape and safety glazing requirements.

Professional installers registered with a competent person scheme like FENSA can self-certify compliance. As a DIY installer, you can’t — which means you must notify your local authority Building Control and pay for inspection. Skip this and you may face problems (and costs) when you come to sell, as the missing certification shows up in conveyancing searches.

Getting It Physically Wrong

The practical pitfalls are real: frames fitted out of square that bind or won’t close, inadequate sealing that lets water and draughts in, poor packing that distorts the frame over time, and damage to the units during handling. Any of these can turn a saving into an expensive re-do.

When DIY Makes Sense

Pulling it together, supply-only DIY is worth it when several things line up.

You have genuine intermediate-plus carpentry skills and have done comparable work. You either own the tools or the project is large enough to justify buying them. You’re prepared to handle Building Regulations notification properly. You’ve confirmed self-installation won’t void your warranty. And you have realistic expectations about the time involved.

Tick those boxes and the 30-40% saving is yours to claim. For a straightforward ground-floor casement replacement in particular, a competent DIYer can do an excellent job.

When to Pay for Fitting

Equally, some situations call for professional installation regardless of your skills.

Large or heavy units at height, structural openings that need altering, sash windows with their weights and cords (more complex than casements), listed buildings or conservation areas where compliance is critical, and any project where warranty protection or FENSA certification matters to you. In these cases, the installer’s fee buys certainty — and certainty is often worth more than the saving.

Frequently Asked Questions

What does supply only mean for timber windows?

Supply only means the manufacturer makes and delivers your bespoke windows, but you arrange installation yourself, either fitting them personally or hiring a separate fitter. It contrasts with “supply and fit”, where one company handles everything. Supply only puts you in control of the installation and responsible for its quality.

How much can I save fitting windows myself?

Installation typically accounts for 30-40% of a window project’s total cost, so DIY fitting can capture most of that. On a project where installation would cost £3,000, that’s a substantial saving — though you should subtract any tool outlay (£300-500) and value your own time, since DIY takes two to three times longer than a professional.

Does DIY installation void the warranty?

It can. Many manufacturers’ guarantees depend on correct installation, and self-fitting may void product warranty cover. This is one of the most important things to check before committing to DIY. Always confirm the specific warranty terms with your supplier first — the protection you lose may outweigh the money you save.

Do I need to tell Building Control if I fit my own windows?

Yes. Replacement windows must comply with Building Regulations. Professional installers registered with a competent person scheme (like FENSA) can self-certify, but DIY installers cannot — so you must notify your local authority Building Control and arrange inspection. Skipping this can cause problems and costs when you sell the property.

Is fitting sash windows harder than casements?

Generally yes. Sash windows involve weights or spring balances, cords, and finely balanced moving parts, making them more complex to install correctly than side-hung casements. For a first DIY window project, straightforward ground-floor casements are far more forgiving than sashes. Consider professional fitting for sashes unless you’re confident.

How long does DIY window installation take?

Expect two to three times longer than a professional. A fitter working daily might install several windows in a day; a capable DIYer should plan for roughly half a day to a day per window, more for sashes or awkward openings. Rushing is where mistakes happen, so allow generous time rather than working to a tight deadline.

Conclusion

Supply-only DIY can save you 30-40% of your project cost, a real reward for real skill. But it’s intermediate-plus carpentry, not a beginner’s job, and the risks are real: voided warranties, Building Regulations pitfalls, and the practical hazards of getting a structural, weather-critical fit wrong.

So where does that leave you? If you’ve hung doors and fitted kitchens to a high standard, own the tools, and will handle the compliance properly, go for it, especially on ground-floor casements. If any of that gives you pause, the installer’s fee buys peace of mind that’s usually worth paying.

Whichever route suits you, we supply bespoke timber windows nationwide, cut to your exact measurements. Get in touch and we’ll help you order with confidence — and advise honestly on whether fitting them yourself is the right call.

listed buldings windows

Listed Building Windows: Consent Process & Requirements

In this article, you’ll discover:

  • When listed building consent is required for windows
  • The consent application process, step by step
  • How Grade I, II* and II requirements differ
  • What “like-for-like” replacement really means
  • How to work effectively with conservation officers
  • Common reasons for refusal — and how to avoid them

Introduction

Owning a listed building is a privilege and a responsibility. Those windows that give the property its character are also legally protected, and replacing or altering them without permission is a criminal offence, not just a planning breach.

That sounds daunting, but the system is navigable. Thousands of listed building owners successfully replace failed windows every year by understanding the process, respecting the building’s significance, and working with rather than against their conservation officer.

This guide walks through listed building consent for windows: when you need it, how to apply, what different grades demand, and how to give your application the best chance of success. We manufacture bespoke timber windows for listed and period properties, so we’ve supported many owners through exactly this process.

When Is Listed Building Consent Required?

The short answer: almost always, for anything beyond basic maintenance.

Listed building consent (LBC) is required for any works that affect the character of a listed building, and windows are considered a defining feature. This includes replacing windows entirely, altering their design, materials, or opening method, and often even significant repairs that change the appearance.

Like-for-like repair using matching materials and methods may sometimes not require consent, but the threshold is low and the risk of getting it wrong is high. Because unauthorised works to a listed building are a criminal offence, the safe course is always to check with your local authority conservation officer before doing anything.

Listed Building Consent vs Planning Permission

These are separate consents. Planning permission concerns land use and development; listed building consent concerns the special architectural or historic interest of the building itself. Window works to a listed building typically need LBC, and may need planning permission too. They’re assessed under different criteria, so don’t assume one covers the other. If your property isn’t listed but sits in a conservation area, different rules apply — see our conservation area windows guide.

The Consent Process, Step by Step

Applying for listed building consent follows a defined path. Understanding it upfront makes the process far smoother.

Step 1: Pre-Application Advice

Before anything else, contact your local authority conservation officer for pre-application advice. This is usually free and invaluable: it tells you what the officer will and won’t accept before you invest in detailed plans. Bring photographs of the existing windows and any evidence of their condition or history.

Step 2: Document the Existing Windows

Your application needs to show what’s there now. Photograph every window to be altered, note the materials, glazing pattern, opening method, and dimensions, and record any historic detailing (glazing bars, horns, ironmongery). Where windows have decayed, document the extent of the damage — evidence that repair isn’t viable strengthens a case for replacement.

Step 3: Prepare Detailed Drawings

LBC applications require detailed drawings: existing and proposed elevations, cross-sections showing profiles and sightlines, and specifications of materials and finishes. This is where precision matters: the drawings must demonstrate that the proposed windows preserve the building’s character. A supplier experienced with listed work can provide the technical detail needed.

Step 4: Submit the Application

Applications are submitted to your local planning authority, usually via the Planning Portal. There is no application fee for listed building consent itself, though you’ll pay for any professional drawings or heritage statements. If planning permission is also required, that carries its own fee (currently £206 for a householder application in England).

Step 5: Assessment and Decision

The authority consults its conservation officer and, for higher grades or significant works, bodies like Historic England. The standard determination period is eight weeks, though complex cases can take longer. You may be asked for amendments during assessment, and engaging constructively here often turns a potential refusal into an approval.

How Grade Affects Requirements

Not all listed buildings are treated equally. The grade reflects significance, and significance drives how strict the requirements are.

Grade I (Exceptional Interest)

Grade I buildings (around 2.5% of listings) are of exceptional national importance. Requirements are the strictest: officers typically demand exact replication of original windows — matching timber species, profiles, glazing patterns, and often traditional single glazing or specialist slim double glazing where permitted. Historic England is usually consulted. There is little flexibility.

Grade II* (Particularly Important)

Grade II* buildings (about 5.8% of listings) are particularly important, above the norm. Requirements are demanding but slightly less absolute than Grade I. Faithful reproduction of the original design is expected, with limited scope for sympathetic modern performance improvements where they don’t harm character.

Grade II (Special Interest)

Grade II covers the vast majority, roughly 92% of listed buildings. Requirements remain serious but there’s more practical flexibility. Officers generally expect timber replacements matching the original style, profiles, and opening method, but sympathetic solutions (including some slim double glazing) are more often accepted, particularly where existing windows are already non-original or beyond repair.

The grade system described here applies to England and Wales. Scotland (categories A, B and C) and Northern Ireland use their own systems, with similar underlying principles.

What “Like-for-Like” Really Means

“Like-for-like” is the phrase you’ll hear constantly, and it’s stricter than many owners expect.

It means replacing what’s there with a true match: the same material (timber for timber, never uPVC), the same glazing pattern and bar profiles, the same opening method (sash for sash, casement for casement), the same sightlines and dimensions, and matching ironmongery and detailing such as sash horns where original.

Swapping timber sashes for uPVC casements is emphatically not like-for-like. Even switching from a slender original profile to a chunkier modern one can fail the test — a Georgian 6-over-6 sash, for example, depends on fine glazing bars that standard units can’t replicate. The principle is that the replacement should be visually indistinguishable from the original to a reasonable observer.

Working with Conservation Officers

Your conservation officer is the single most important relationship in this process. Treat them as a partner, not an obstacle.

Officers respond well to owners who demonstrate genuine respect for the building’s significance, come prepared with thorough documentation, seek advice early rather than presenting a finished plan, and show willingness to compromise on performance where it protects character. Approaching the relationship collaboratively — asking “what would you accept here?” rather than “why won’t you let me?” — consistently produces better outcomes.

Where existing windows are demonstrably beyond repair, good documentation of their condition helps the officer justify approving replacement. Officers want to protect the building, but they also understand that failed windows must sometimes be replaced.

Common Reasons for Refusal

Understanding why applications fail helps you avoid the traps.

The most common reasons are proposing inappropriate materials (uPVC or aluminium where timber is required), incorrect profiles or glazing patterns that don’t match the original, chunky sightlines from standard double glazing that alter the window’s delicacy, insufficient documentation or drawings that don’t demonstrate character preservation, and proposing replacement where the officer believes repair is viable. Most of these are avoidable with early advice and a supplier experienced in heritage work.

If You’re Refused

A refusal isn’t necessarily the end. You can revise and resubmit addressing the officer’s concerns, or appeal to the Planning Inspectorate within the stated timeframe. In practice, engaging with the officer’s reasons and amending the proposal is usually more productive — and faster — than a formal appeal.

Frequently Asked Questions

Do I need consent to replace windows in a listed building?

Almost certainly, yes. Listed building consent is required for any works affecting the building’s character, and windows are a defining feature. Even significant repairs may need consent. Because unauthorised works are a criminal offence, always check with your local authority conservation officer before starting — pre-application advice is usually free.

What’s the difference between Grade I and Grade II listed windows?

Grade I buildings (exceptional interest, ~2.5% of listings) demand the strictest treatment, usually exact replication of original windows with little flexibility. Grade II buildings (~92% of listings) remain serious but offer more practical flexibility, with sympathetic solutions like some slim double glazing more often accepted, especially where windows are already non-original or beyond repair.

How much does listed building consent cost?

There is no application fee for listed building consent itself. You’ll pay for professional drawings and any heritage statement, and if planning permission is also required, that carries a fee (currently £206 for a householder application in England). Budget for professional documentation, as it’s often essential to a successful application.

What does like-for-like replacement mean?

It means replacing windows with genuinely matching alternatives: the same material (timber, not uPVC), glazing pattern, bar profiles, opening method, sightlines, dimensions, and detailing such as sash horns. The replacement should be visually indistinguishable from the original to a reasonable observer. Switching materials or altering profiles typically fails the like-for-like test.

How long does listed building consent take?

The standard determination period is eight weeks from a valid application, though complex cases (particularly Grade I or II* buildings requiring Historic England consultation) can take longer. Engaging constructively with any amendment requests during assessment often prevents delays and improves the chance of approval.

Can I put double glazing in a listed building?

Sometimes, with consent. Standard double glazing is often refused because it thickens sightlines, but slim double glazing or vacuum glazing that preserves the original profile may be accepted — more readily in Grade II than Grade I buildings. Secondary glazing, which leaves the original window untouched, is frequently the most acceptable route. Always seek your conservation officer’s view first.

Conclusion

Listed building consent for windows is exacting, but it’s not a mystery. Understand when consent is needed, document thoroughly, prepare precise drawings, and — above all — engage your conservation officer early and collaboratively. The stricter the grade, the closer your replacements must match the originals, with Grade I demanding near-exact replication and Grade II allowing more room for sympathetic solutions.

Get the material, profile, and detailing right, respect the “like-for-like” principle, and most applications succeed. The windows that make a listed building special deserve that care.

We manufacture bespoke timber windows to the exacting standards listed building work demands, and we’re used to supporting owners through the consent process. Talk to us about your project and we’ll help you get the specification — and the paperwork — right.

Matching Timber Windows to Your Home’s Architecture

In this article, you’ll discover:

  • How to identify the correct window style for your property’s era
  • Georgian, Victorian, Edwardian, 1930s and modern window characteristics
  • The glazing patterns that define each architectural period
  • Common mistakes that make replacement windows look wrong
  • How proportion and sightlines affect authenticity
  • Why getting the details right protects your home’s value

Introduction

Windows are the eyes of a building. Get them right and a period home sings — the proportions feel balanced, the detailing looks intentional, the whole facade comes together. Get them wrong and something feels off, even to people who can’t quite say why.

That “something’s wrong” feeling is almost always down to mismatched windows. A Victorian terrace fitted with plain modern casements, a 1930s semi given mock-Georgian bars, an Edwardian villa stripped of its delicate top-lights — these mistakes are surprisingly common, and they quietly undermine a home’s character.

The good news is that matching windows to architecture isn’t difficult once you understand the principles. Each era has recognisable window styles, glazing patterns, and proportions. Learn to read them, and you can specify replacements that look like they belong.

We manufacture bespoke timber windows in styles appropriate to every period of British housing. This guide explains how to match yours correctly.

Reading Your Home’s Era

Before choosing windows, identify what you’re working with. British housing falls into broadly recognisable periods, each with distinct window conventions.

The clues are everywhere: brick bond and colour, roof pitch, door style, decorative details, and of course the original windows if any survive. Neighbouring properties that retain original features are an invaluable reference — walk your street and look at what the best-preserved houses still have.

If you’re genuinely unsure, local history societies, estate agent listings of similar properties, and conservation area appraisals (published by your council) all help pin down the period and its appropriate detailing. Historic England’s listing and research resources can also help you understand your property’s age and significance.

Georgian Windows (1714-1837)

The earliest period most homeowners encounter, the Georgian era established the principles of classical proportion that defined British window design for over a century.

The Six-Over-Six Sash

The classic Georgian window is the vertical sliding sash divided into small panes — most often a six-over-six arrangement (six panes in each sash). Glass technology of the period couldn’t produce large sheets, so windows were necessarily made up of many small panes held by slender glazing bars (astragals).

Those slender astragal bars are the signature of Georgian glazing. They’re far thinner than later Victorian bars, and preserving their delicacy is essential to authenticity — which is exactly why slim glazing matters so much on Georgian properties.

Proportion and Symmetry

Georgian architecture obeyed strict rules of proportion. Windows diminished in height up the floors, were arranged in rigid symmetry across the facade, and followed careful mathematical ratios. Getting these proportions right matters more than almost any other detail on a Georgian building.

Georgian sashes typically had no horns — the sash horn is a later Victorian development. Fitting horned sashes to a Georgian property is a subtle but real anachronism that informed observers notice.

Victorian Windows (1837-1901)

The Victorian era defined much of Britain’s housing stock, and its windows are among the most recognisable.

The Classic Sash

The dominant Victorian window is the vertical sliding sash. Early and mid-Victorian sashes often used multi-pane configurations, but as glass manufacturing improved, larger panes became fashionable.

The signature Victorian arrangement is the two-over-two sash — two panes in the upper sash, two in the lower, divided by a single vertical glazing bar. This became possible as sheet glass grew larger and cheaper, and it’s the configuration most people picture when they think “Victorian window.”

Sash Horns

A defining Victorian detail is the sash horn — the small projecting extension at the bottom corners of the upper sash. These appeared as larger, heavier panes of glass required stronger joints. They’re both functional and decorative, and their presence is a hallmark of authentic Victorian sashes.

Replacing Victorian sashes without sash horns is one of the most common authenticity mistakes. The horns are a small detail, but their absence reads as wrong to anyone familiar with the period.

Victorian Proportions

Victorian windows are typically tall and relatively narrow, emphasising verticality. The upper sash was often slightly shorter than the lower. Frames sat in reveals, recessed from the brick face — a detail that creates the characteristic shadow lines of a period facade.

For genuine Victorian properties, vertically sliding timber sash windows in a two-over-two configuration, complete with horns, are almost always the correct choice.

Edwardian Windows (1901-1910)

The Edwardian period brought a lighter, more decorative sensibility — and its windows reflect this shift.

Larger Glass, More Light

Edwardian homes generally have larger windows than their Victorian predecessors, letting in more light. The lower sash was frequently a single large pane, while the upper sash carried the decorative interest.

Decorative Top-Lights

The signature Edwardian feature is the multi-pane upper sash — often a six-pane or margin-light arrangement above a single-pane lower sash. These decorative top-lights might include coloured or leaded glass, creating a lighter, prettier composition than the austere Victorian two-over-two.

This “one-over-six” or “one-over-many” arrangement is distinctly Edwardian. The contrast between the plain lower sash and the decorative upper is the period’s calling card.

Bay Windows and Detailing

Edwardian houses frequently feature bay windows, often with elaborate timber detailing. The overall impression is more relaxed and decorative than the Victorian era — softer proportions, more glass, prettier glazing patterns.

1930s Windows (Interwar Period)

The interwar years saw a decisive break from the sliding sash tradition.

The Rise of the Casement

1930s housing — the era of the suburban semi — largely abandoned sash windows in favour of side-hung casements. These windows open outward on hinges rather than sliding vertically, and they define the look of interwar suburbia.

For genuine 1930s properties, timber casement windows are the authentic choice. Fitting sash windows to a 1930s semi is as much a mistake as fitting casements to a Victorian terrace.

Distinctive Glazing Patterns

The 1930s loved decorative glazing patterns. The sunrise (or sunburst) motif — radiating bars forming a fan or rising-sun pattern — is the era’s most iconic detail, often appearing in the upper portion of windows or in front doors.

Other common patterns include horizontal glazing bars, small-pane top-lights over larger clear panes, and geometric Art Deco influences. These patterns are a defining feature; plain glazing on a 1930s house misses the period’s character entirely.

Metal-Look and Leaded Lights

Many 1930s windows featured leaded lights — small diamond or rectangular panes held in lead cames. Timber casements with leaded or simulated leaded glazing capture this look while delivering modern performance.

Modern and Contemporary Windows

Post-war and contemporary homes call for a completely different approach.

Clean Lines and Large Glass

Modern architecture prizes light, openness, and minimal visual obstruction. Large panes of glass, slim frames, and few or no glazing bars suit these properties. The decorative divisions essential to a Victorian or Edwardian window would look fussy and wrong on a clean contemporary facade.

Flush and Minimal

For modern homes, flush casement windows with large unobstructed panes provide the clean lines the architecture demands. Where glazing bars are used, they tend to be minimal and structural rather than decorative.

The principle reverses from period properties: instead of adding authentic detail, you’re stripping it back. Simplicity is the goal.

The Common Mistakes

Understanding what goes wrong is as useful as knowing what’s right. These are the errors we see most often.

Wrong Glazing Pattern

The single most common mistake is the wrong glazing configuration for the era. Mock-Georgian bars (those uniform grids) get fitted to Victorian, Edwardian, and 1930s houses where they were never original. The result looks generic and historically confused.

Match the pattern to the period: two-over-two for Victorian, decorative top-lights for Edwardian, sunrise or geometric for 1930s, minimal for modern.

Incorrect Proportions

Even the right style fails if the proportions are off. Windows that are too wide, too short, or differently proportioned than the originals throw off the whole facade. The relationship between glass area, frame, and glazing bars matters enormously.

Where original windows survive elsewhere on the building or street, measure and match their proportions. Our guidance on measuring for sash windows helps get dimensions right.

Mismatched Materials

Fitting uPVC to a period property is the most jarring material mistake — the chunky profiles and plastic sheen never convince. Even where planning permits it, timber remains the authentic and superior choice for character homes. The grain, the paintable finish, and the slim profiles simply look right.

Chunky Sightlines

Standard double glazing forces heavier glazing bars, which thicken the delicate sightlines of period windows. For sensitive properties, slim glazing preserves authentic proportions. The width of a glazing bar might seem trivial, but it’s one of the details the eye registers immediately.

Ignoring the Reveal

Original windows often sat recessed from the brick face, creating shadow lines that contribute to a facade’s depth and character. Fitting replacements flush with the wall flattens the appearance. Maintaining the original reveal depth preserves this subtle but important quality.

Why Getting It Right Matters

Beyond aesthetics, correct windows protect your investment.

Character and Value

Sympathetic windows demonstrably support property value, particularly for period homes where buyers actively seek original character. Inappropriate windows can knock thousands off a sale price and put off the very buyers most drawn to a period property. Authentic detailing adds long-term value in a way that generic replacements never will.

Planning and Conservation

In conservation areas and on listed buildings, correct windows aren’t optional — they’re required. Getting the style, pattern, and proportions right is essential for approval, and incorrect installations can be enforced against. Understanding period detailing keeps you on the right side of planning rules.

A Coherent Whole

Most fundamentally, correct windows make a house feel complete. The proportions resolve, the detailing makes sense, and the building reads as the coherent design its architect intended. That sense of rightness is hard to quantify but immediately felt.

Frequently Asked Questions

How do I know what window style my house originally had?

Look at the best-preserved houses of the same age on your street — they’re your best reference. Original features on your own property, historic photographs, conservation area appraisals from your council, and estate agent listings of similar homes all help. The brick, roofline, and door style also indicate the era and its appropriate window conventions.

What’s the difference between Victorian and Edwardian windows?

Victorian sashes typically use a two-over-two pane arrangement with sash horns, emphasising tall narrow proportions. Edwardian windows are generally larger and lighter, often featuring a single-pane lower sash beneath a decorative multi-pane upper sash, sometimes with coloured or leaded glass. Edwardian style is prettier and more decorative; Victorian is more austere.

Are sash windows wrong for a 1930s house?

Generally, yes. 1930s housing predominantly used side-hung casement windows, often with distinctive glazing patterns like the sunrise motif. Fitting vertical sliding sashes to a 1930s semi is historically inaccurate — timber casements with period-appropriate glazing are the authentic choice for interwar properties.

Can I fit modern double glazing to a period property?

Yes, with care. Modern sealed units can be incorporated into authentic timber frames, though standard units may thicken glazing bars and affect sightlines. For sensitive or listed properties, slim double glazing preserves period proportions while delivering thermal performance. The key is maintaining the correct style and slender profiles.

What glazing pattern suits my Victorian terrace?

The classic Victorian configuration is two-over-two: two panes in the upper sash and two in the lower, divided by a single vertical glazing bar, with sash horns on the upper sash. Earlier Victorian properties sometimes used multi-pane arrangements, so check surviving originals on your street to confirm what’s correct for your specific period.

How can I tell if my house is Georgian rather than Victorian?

Georgian properties (1714-1837) typically have small-pane sashes — often six-over-six — with very slender glazing bars and no sash horns, arranged in strict symmetry. Victorian sashes (1837-1901) usually have fewer, larger panes (commonly two-over-two) and feature sash horns. Georgian facades follow rigid proportional rules; Victorian design is often more varied and decorative.

Does matching window style really affect property value?

Yes, particularly for period homes. Buyers of character properties actively seek authentic features, and inappropriate windows — wrong style, chunky uPVC, incorrect proportions — can reduce value and deter buyers. Sympathetic timber windows that match the architecture support and protect a period home’s value.

Conclusion

Matching windows to architecture comes down to reading your home’s era and respecting its conventions. Georgian properties want delicate six-over-six sashes with slender bars and no horns; Victorian properties want two-over-two sashes with horns; Edwardian homes suit decorative top-lights; 1930s houses call for casements with period glazing patterns; modern buildings demand clean, minimal lines.

Avoid the common traps — wrong glazing patterns, incorrect proportions, mismatched materials, and chunky sightlines — and your replacement windows will look like they belong. The details that seem minor (a sash horn, a glazing bar’s width, a recessed reveal) are exactly what the eye registers.

Get them right and the reward is a home that feels complete, commands its full value, and satisfies any conservation requirements. Whatever the era of your home, the windows should look as though they were always meant to be there. We make bespoke timber windows matched to every period of British architecture — send us your details and we’ll help you get the style and proportions right.

acoustic window

Acoustic Glass for Timber Windows: Noise Reduction Guide

In this article, you’ll discover:

  • How acoustic performance is measured (Rw ratings explained)
  • The three main acoustic glazing options compared
  • Realistic decibel reductions you can expect
  • Why laminated glass outperforms standard double glazing
  • Costs versus standard glazing (+£60-100 per m²)
  • Which option suits your noise problem

Introduction

If you live on a busy road, near a railway, or under a flight path, you’ll know that noise wears you down. Traffic rumble, sirens, aircraft — it disrupts sleep, raises stress, and makes a home feel less like a sanctuary.

Acoustic glazing won’t make your home silent. No window can. But the right specification can transform how much external noise reaches you — often cutting perceived loudness by half or more. The key is matching the glazing to the type of noise you’re dealing with.

There’s a lot of confusion about soundproof windows, much of it driven by marketing. This guide cuts through it: how acoustic performance is actually measured, what the different options deliver, and what you should realistically expect.

We manufacture timber windows with acoustic glazing options suited to noisy locations. Here’s what you need to know.

How Acoustic Performance Is Measured

Before comparing options, you need to understand the numbers.

Rw Ratings Explained

Acoustic performance is measured as a weighted sound reduction index, written as Rw and expressed in decibels (dB). The higher the Rw figure, the more sound the glazing blocks. The Glass and Glazing Federation publishes guidance on how these ratings are tested and what they mean in practice.

As a rough guide:

  • Standard double glazing: Rw around 29-31 dB
  • Good acoustic glazing: Rw around 38-40 dB
  • Excellent acoustic glazing: Rw 45 dB and above

What the Numbers Actually Mean

Here’s the crucial part most people miss: decibels are logarithmic. A reduction of 10 dB is perceived as roughly halving the loudness. So upgrading from standard double glazing (Rw 30) to good acoustic glazing (Rw 40) doesn’t sound “33% better” — it sounds about half as loud.

That perceptual difference is why acoustic glazing is so effective for sleep and comfort, even when the dB figures look modest on paper.

The Weakest Link Principle

A window is only as quiet as its weakest element. Excellent acoustic glass in a poorly sealed frame won’t perform — sound leaks through gaps. Quality timber frames with good compression seals are essential to realising the glazing’s rated performance. This is one area where frame quality directly affects acoustic results.

The Three Main Acoustic Options

There are three established approaches to reducing noise through glazing. Each works differently.

1. Laminated Acoustic Glass

Laminated glass consists of two panes bonded with a plastic interlayer (PVB). For acoustic applications, a special acoustic-grade PVB interlayer is used — it’s softer and damps sound vibration far more effectively than standard laminate.

This is the single most effective glazing upgrade for noise. The interlayer absorbs sound energy that would otherwise pass straight through the glass. As a bonus, laminated glass also improves security and blocks virtually all UV.

Laminated acoustic glass typically achieves Rw 35-40 dB in a sealed unit.

2. Asymmetric Double Glazing

Standard double glazing uses two panes of equal thickness — which means both resonate at the same frequencies, letting certain sounds through more easily. Asymmetric glazing uses panes of different thicknesses (say 4mm and 6mm), so each pane blocks the frequencies the other lets through.

This is a clever, cost-effective improvement. By staggering the resonant frequencies, asymmetric units handle a broader range of noise than symmetric ones. Combined with a laminated pane, asymmetric construction delivers excellent broadband performance.

3. Secondary Glazing

Secondary glazing adds an independent internal window behind the existing one, creating a wide air gap (100mm or more). That large gap is acoustically very effective — often outperforming sealed units for low-frequency noise like traffic rumble.

It’s particularly useful for listed buildings and conservation areas where the external window can’t be altered. The downside is a second window to open and clean, and it’s visually more intrusive than a single high-performance unit.

Matching Glazing to Your Noise Problem

Different noises need different solutions. This is where specification matters.

High-Frequency Noise (Voices, Sirens, Aircraft)

Higher-frequency sounds are relatively easy to block. Laminated acoustic glass in a well-sealed double-glazed unit handles these effectively. Most road and urban noise falls partly into this range.

Low-Frequency Noise (Traffic Rumble, Trains, Bass)

Low-frequency noise is much harder to stop — it’s the rumble you feel as much as hear. Wide air gaps work best here, which is why secondary glazing often outperforms slim sealed units for traffic and railway noise. Asymmetric glazing with a wide cavity also helps.

Mixed Urban Noise

For the typical busy-road mix of traffic, voices, and occasional sirens, the best single-unit solution is an asymmetric double-glazed unit with one laminated acoustic pane. This combination handles the broadest range of frequencies in one window.

Cost: What Acoustic Glazing Adds

Acoustic upgrades carry a clear but reasonable premium.

The Premium Over Standard Glazing

Expect acoustic glazing to add roughly £60-100 per square metre over standard double glazing. For a typical window of around 1.5m², that’s an extra £90-150 per window — a modest premium for a meaningful improvement in comfort.

Secondary glazing is priced differently, as it’s effectively a second window. Costs vary widely depending on size and specification, but it can be cost-effective where the existing window is sound and only acoustic improvement is needed.

Is It Worth It?

For homes in genuinely noisy locations, acoustic glazing is one of the highest-impact upgrades available. Better sleep, lower stress, and a more usable home are hard to put a price on. Acoustic glazing can also add value when selling a property on a busy road, where noise is a common buyer concern.

For homes in quiet areas, standard double glazing’s Rw 30 is perfectly adequate — there’s no need to pay for acoustic performance you won’t notice.

Acoustic Glass and Thermal Performance

A common question: does acoustic glazing compromise insulation?

The good news is that acoustic and thermal performance aren’t in conflict. Acoustic glazing can incorporate low-E coatings and argon gas fills just like standard energy-efficient units. You get both quiet and warmth in the same window.

In fact, laminated acoustic units often deliver slightly better thermal performance than basic double glazing due to the additional interlayer. A well-specified acoustic window meets Building Regulations U-value requirements (1.4 W/m²K maximum) while dramatically reducing noise.

Frequently Asked Questions

How much quieter will acoustic glazing make my home?

Upgrading from standard double glazing (Rw 30) to good acoustic glazing (Rw 40) reduces sound by about 10 dB — perceived as roughly halving the loudness. The exact improvement depends on your starting point, the noise type, and frame sealing. Low-frequency noise like traffic rumble is harder to reduce than higher-frequency sounds.

Does acoustic glass work for traffic noise?

Yes, though traffic noise includes low-frequency rumble that’s harder to block. For traffic, an asymmetric double-glazed unit with a laminated acoustic pane works well, and secondary glazing with a wide air gap is often even more effective. Frame sealing is critical — gaps undermine even the best glass.

Is laminated glass better than standard double glazing for noise?

Significantly. The acoustic PVB interlayer in laminated glass damps sound vibration far more effectively than an air gap alone. Laminated acoustic glass typically achieves Rw 35-40 dB versus around 30 dB for standard double glazing — a clearly noticeable difference, especially for sleep.

Can I have acoustic glazing in a listed building?

Often the most practical option for listed buildings is secondary glazing, which leaves the original window untouched and delivers excellent acoustic performance through its wide air gap. Where slim sealed units are permitted, acoustic laminated panes can sometimes be incorporated. Always consult your conservation officer first.

Does acoustic glazing affect energy efficiency?

No — in fact it can improve it. Acoustic glazing incorporates the same low-E coatings and argon fills as energy-efficient units, and the laminated interlayer often adds slight thermal benefit. A well-specified acoustic window delivers both noise reduction and Building Regulations-compliant thermal performance.

Conclusion

Acoustic glazing can transform life in a noisy home — not by creating silence, but by cutting external noise enough to restore comfort and sleep. The key is understanding that a 10 dB improvement halves perceived loudness, and matching the glazing to your specific noise problem.

For most busy-road homes, an asymmetric double-glazed unit with a laminated acoustic pane is the sweet spot. For listed buildings or severe low-frequency noise, secondary glazing earns its place. And crucially, none of this comes at the expense of thermal performance — you can have quiet and warmth together.

The right acoustic specification depends on where you live and the noise you’re up against. We build bespoke timber windows with acoustic glazing matched to both — tell us about your noise problem and we’ll recommend a specification that fits.

sticking sash windows

How to Fix Sticking Sash Windows

In this article, you’ll discover:

  • The four common causes of sticking sash windows
  • Why paint buildup accounts for most stuck windows
  • Step-by-step fixes for each cause
  • How to deal with swollen timber and humidity
  • Simple maintenance that prevents sticking returning
  • When the problem needs a professional

Introduction

A sash window that won’t budge is one of the most common complaints with traditional timber windows — and one of the most fixable. Before you assume the worst and start pricing up replacements, know this: the vast majority of sticking sashes are caused by something trivial.

Paint buildup alone accounts for roughly 80% of stuck sash windows. Decades of repainting without proper preparation gradually glue the sash to its frame. The fix is straightforward and costs almost nothing.

The rest usually come down to swollen timber, worn cords, or minor misalignment — all manageable with basic tools and a bit of patience.

We manufacture and restore timber sash windows, and we’ve freed countless stuck sashes over the years. This guide walks through diagnosing and fixing the problem yourself.

Why Sash Windows Stick: The Four Causes

Before reaching for tools, work out what’s actually wrong. Each cause has a different fix.

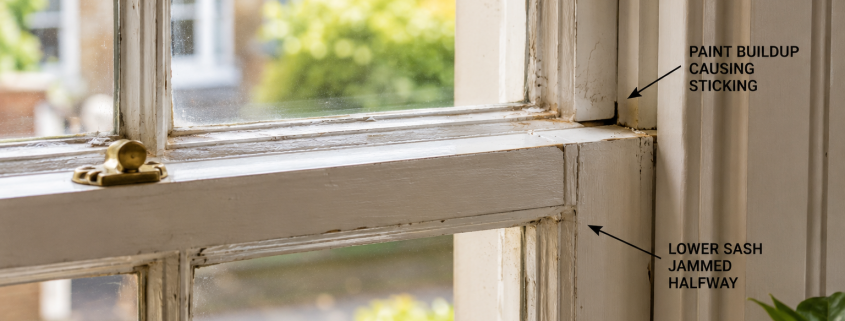
1. Paint Buildup (Around 80% of Cases)

This is the big one. Every time a window gets repainted without the sash being moved or the edges being cut back, a little more paint bridges the gap between sash and frame. Over decades, these layers fuse the sash to the staff beads and parting bead.

You’ll recognise it by thick, cracked paint along the edges where sash meets frame — and often a window that hasn’t been opened in years.

2. Humidity and Swollen Timber

Timber absorbs moisture and expands. In damp conditions — wet winters, bathrooms, kitchens — a sash can swell just enough to bind in its frame. This kind of sticking often comes and goes with the seasons, easing in dry summer months and returning in winter.

3. Worn or Broken Sash Cords

If a sash drops, jams at an angle, or feels unbalanced, the cords may be worn or broken. A snapped cord lets the sash sit unevenly, catching against the frame. This is a different problem with its own solution — full cord replacement.

4. Misaligned Sashes or Beads

Sometimes the staff beads (the inner mouldings holding the lower sash) have been refitted too tightly, or the sash has shifted in its frame. The result is excess friction that makes operation stiff even without paint or swelling.

Fixing Paint Buildup

Since this causes most sticking, start here.

What You’ll Need

A craft knife or paint scraper, a stiff putty knife or thin filling knife, sandpaper (medium and fine grade), a hammer and a thin timber wedge or old chisel, and candle wax or a proprietary sash lubricant.

Step 1: Break the Paint Seal

Run a sharp craft knife firmly along the joint between the sash and the frame on both the inside and outside. You’re cutting through the paint film that’s bridging the gap. Work the full length of both vertical edges where the sash meets the beads.

Step 2: Ease the Sash Free

Gently work a thin putty knife or wedge into the joint and apply steady pressure. Don’t force it or hammer hard — you risk splitting the beads or cracking glass. Work along the length, easing a little at a time. The sash should gradually release.

If the lower sash still won’t move, you may need to carefully prise off a staff bead to free it (score the paint line first to avoid tearing).

Step 3: Clean the Runs

With the sash free, scrape and sand the painted surfaces in the channels (the runs) where the sash slides. Remove built-up paint down to a smooth surface. Don’t strip back to bare timber unless necessary — just remove the excess that’s causing friction.

Step 4: Lubricate

Rub candle wax or apply a sash lubricant to the cleaned runs and the sash edges. This dramatically reduces friction and helps prevent the problem returning. Avoid oil-based lubricants on painted surfaces — wax works better and doesn’t attract dirt.

Step 5: Test and Refit

Slide the sash up and down several times to confirm smooth operation. Refit any beads you removed, taking care not to over-tighten them against the sash.

Dealing with Swollen Timber

If humidity is the culprit, the approach is different.

Identify the Binding Point

Open the window as far as it will go and look for shiny, compressed, or marked areas on the sash edges — these show where the timber is rubbing. Often it’s just one localised spot, not the whole edge.

Light Planing or Sanding

Where a swollen area binds, remove a small amount of timber with a sharp plane or coarse sandpaper. Take off the minimum needed — you can always remove more, but you can’t put it back. Aim for a 2-3mm clearance between sash and frame.

Once you’ve planed bare timber, prime and repaint the exposed area to seal it against future moisture. Unsealed timber will simply absorb water and swell again.

Address the Underlying Damp

Planing treats the symptom. If condensation or damp is causing repeated swelling, improving ventilation and heating will do more than repeated planing. Persistent moisture also accelerates timber decay, so it’s worth resolving properly.

Replacing Worn Sash Cords

If the sticking is caused by cord failure, no amount of cleaning or planing will help.

A worn cord lets the sash hang unevenly, catching against the frame. A broken one means the sash won’t stay open at all. The fix is full cord replacement — removing the sashes, accessing the weight pockets, and fitting new waxed cotton cord.

This is a more involved job, but well within DIY capabilities. If your sashes use weights rather than spring balances, our guidance on choosing weights or springs explains the systems. Replacement sash weights are available if yours are missing or incorrect after previous work.

Fixing Misaligned Beads

If beads have been refitted too tightly, the fix is simple.

Carefully prise off the offending staff bead, then refit it with a fraction more clearance — a business card’s thickness is often enough. The sash should slide freely without the bead being so loose that the window rattles.

Take care with the hardware and fittings while you work. Old fasteners and pulleys can be brittle, and forcing them risks damage.

Preventing Sticking from Returning

A little maintenance keeps sashes moving freely.

Open and close each sash a few times every couple of months — windows that never move are the ones that seize. When repainting, always cut the sash free afterwards and never paint the running surfaces in the channels. Keep the runs lightly waxed, and address any damp or condensation promptly before it swells the timber.

Regular maintenance is far less effort than freeing a sash that’s been painted shut for a decade. For older and historic sashes, Historic England’s advice on traditional windows is worth reading before you start work.

When to Call a Professional

Most sticking is straightforward DIY, but some situations warrant expert help.

Consider a professional if the timber shows significant rot or decay (the window may need repair beyond freeing the sash), the sash cords and weights need replacing and you’re not confident dismantling the window, the glass is loose or cracked and at risk during the work, or the window is large, heavy, or at height where safe handling is difficult.

Professional sash window repair typically costs £80-200 depending on the work involved. For windows beyond economic repair, replacement timber windows with modern spring balances eliminate the cord-related causes of sticking entirely.

Frequently Asked Questions

Why has my sash window suddenly stopped opening?

The most likely cause is paint buildup that has finally bridged the gap between sash and frame — this accounts for around 80% of stuck sashes. If the window worked recently, swollen timber from damp weather is another common cause. A sudden drop or angle suggests a broken sash cord. Diagnose before applying force.

Can I fix a sticking sash window without removing it?

Often yes. Paint-related sticking can usually be fixed in place by cutting the paint seal, easing the sash free, cleaning the runs, and lubricating. Swollen timber can be lightly planed where it binds. Only cord replacement and major misalignment require removing the sash from the frame.

What’s the best lubricant for sash windows?

Candle wax or a dedicated sash lubricant works best on the running surfaces. Avoid oil-based products on painted surfaces — they attract dirt and can go gummy. Wax reduces friction effectively without making a mess, and a quick application every year or two keeps sashes sliding smoothly.

How do I stop my sash windows sticking in winter?

Winter sticking usually means the timber is absorbing moisture and swelling. Improve ventilation and heating to reduce indoor humidity, ensure exposed timber is properly sealed with paint, and address any condensation issues. Where a specific spot binds, light planing followed by repainting the bare area prevents it reabsorbing moisture.

Is it worth repairing old sash windows or should I replace them?

If the timber is sound, repair is almost always worthwhile — sticking is usually a cheap, simple fix and original sashes have character that’s hard to replicate. Replacement makes sense only when timber is extensively rotten or the windows are beyond economic repair. Many century-old sash windows have decades of life left in them.

Conclusion

A sticking sash window is rarely the disaster it feels like. Eight times out of ten it’s paint buildup — a problem solved with a sharp knife, some patience, and a rub of wax. Swollen timber, worn cords, and tight beads cover most of the rest, and all are manageable with basic DIY skills.

Diagnose before you force anything. Freeing a sash with care preserves the window; forcing it risks splitting beads and cracking glass. And once it’s moving freely, a little routine maintenance keeps it that way.

If your sash windows need more than freeing — or you’re weighing repair against replacement — get in touch for a free quote and we’ll give you an honest assessment.

Timber Windows

Slim Double Glazing for Listed Buildings

In this article, you’ll discover:

  • How slim double glazing differs from standard units
  • Why slim units preserve heritage sightlines and proportions
  • Realistic approval chances for Grade I, II* and II listings
  • Vacuum glazing as an ultra-slim alternative
  • The cost premium you should expect (and why)
  • Honest thermal performance figures versus standard glazing

Introduction

Listed building owners face a frustrating dilemma. You want the warmth and quiet of double glazing, but conservation rules demand you preserve the slender profiles of historic windows. Standard sealed units — typically 24mm thick — simply won’t fit the delicate rebates of a Georgian sash without ruining its appearance.

Slim double glazing exists to solve exactly this problem. At 12-14mm total thickness, these units fit into traditional timber sections while delivering genuine thermal improvement over single glazing.

It’s not a perfect solution — the thermal performance sits below standard double glazing, and approval is never guaranteed. But for many listed properties, slim units represent the only realistic way to combine heritage compliance with modern comfort.

We manufacture timber windows with slim glazing options designed for period and listed properties. This guide explains what’s possible, what’s likely to be approved, and what it costs.

What Is Slim Double Glazing?

The defining feature is thickness — or rather, the lack of it.

Standard vs Slim Units

A standard double-glazed sealed unit measures around 24-28mm: two panes of 4mm glass separated by a 16-20mm cavity. That cavity width is what delivers the thermal performance, but it also demands deep rebates that historic windows don’t have.

Slim units compress everything down. Two panes (often 3-4mm each) separated by a cavity as narrow as 4-8mm produce a total thickness of just 12-14mm. This fits into the slender glazing rebates of traditional sashes and casements.

The Cavity Compromise

Here’s the catch: a narrower cavity means reduced thermal performance. The gas-filled gap between panes is what slows heat transfer, and a smaller gap does less work. This is the fundamental trade-off of slim glazing — you gain a fit that preserves appearance, but you sacrifice some insulating capacity.

Quality slim units mitigate this with low-E coatings and argon or krypton gas fills. Krypton performs better than argon in narrow cavities, which is why premium slim units often specify it despite the higher cost.

Why Sightlines Matter

To conservation officers, the visual impact of glazing is everything.

What Are Sightlines?

Sightlines refer to the visible width of glazing bars and frame sections when you look at a window. Historic windows have remarkably slender astragal bars — the thin timber or putty lines dividing panes. Part of what makes a Georgian window beautiful is the delicacy of these divisions.

Standard double glazing forces chunkier glazing bars to accommodate thick sealed units. The result looks wrong — heavy, modern, and out of character. A trained eye spots it instantly, and so do conservation officers.

Preserving Authentic Proportions

Slim units allow glazing bars to remain close to historic dimensions. The window retains its original visual rhythm — the play of light across multiple small panes, the shadow lines of slender bars, the proportions the building was designed around.

For genuine sash windows with traditional horns and period detailing, this preservation of sightlines is often the difference between approval and refusal.

Approval Chances by Listing Grade

This is where honesty matters more than optimism. Approval is never guaranteed, and it varies significantly by grade.

The grade system below applies to England and Wales. Scotland uses categories A, B and C, and Northern Ireland uses its own grading — the principles are similar, but check the system for your nation. Historic England’s guidance on traditional windows is a useful reference for understanding what conservation officers look for.

Grade II Listings (Best Chances)

Grade II covers roughly 92% of listed buildings — the majority of listed homes. Conservation officers handling Grade II properties generally have more flexibility, and slim double glazing is frequently approved where it preserves appearance.

Your chances improve considerably if the existing windows are already replacements (not original historic fabric), the slim units maintain authentic sightlines, and you’re replacing rotten or failed windows rather than serviceable ones.

Grade II* Listings (Variable)

Grade II* buildings (about 5.8% of listings) are considered particularly important. Officers scrutinise applications more closely. Slim glazing may be approved, but expect to demonstrate that original windows are beyond repair and that the proposed units genuinely preserve character.

Grade I Listings (Most Difficult)

Grade I buildings (around 2.5% of listings) are of exceptional interest. Approval for any glazing change is difficult. Officers often require retention and repair of original single-glazed windows, with secondary glazing as the only acceptable thermal improvement.

The Secondary Glazing Alternative

Where slim double glazing won’t be approved, secondary glazing — a discreet internal pane behind the original window — is often acceptable even for Grade I buildings. It leaves historic fabric completely untouched while improving thermal and acoustic performance. Always discuss this option with your conservation officer.

Vacuum Glazing: The Ultra-Slim Option

For the tightest rebates, vacuum glazing pushes slimness to its limit.

How It Works

Vacuum glazing replaces the gas-filled cavity with a vacuum. Removing air almost entirely eliminates heat transfer by convection, so the gap can be tiny — typically under 1mm — while still insulating effectively. Total unit thickness can be as low as 6-8mm.

Microscopic spacer pillars keep the panes apart against atmospheric pressure. These are barely visible in normal viewing.

Performance and Cost

Vacuum glazing can achieve U-values approaching standard double glazing (around 1.1 W/m²K) in a fraction of the thickness. It’s the highest-performing slim option — and the most expensive.

For the most sensitive listed buildings where rebate depth is severely limited, vacuum glazing may be the only product that fits while delivering meaningful thermal benefit. The premium is substantial, but for irreplaceable historic windows, it can be justified.

Cost: What to Expect

Slim glazing carries a clear premium over both single glazing and standard double glazing.

The 40-60% Premium

Expect slim double-glazed units to cost roughly 40-60% more than standard sealed units. The premium reflects specialist manufacturing — narrow cavities are harder to seal reliably, edge-sealing technology is more complex, and premium gas fills (krypton) add cost.

Vacuum glazing costs considerably more again — often two to three times the price of standard slim units.

Why the Premium Exists

Narrow-cavity units have historically struggled with seal longevity. The edge seal on a 6mm cavity works harder than on a 16mm cavity, and early slim units sometimes failed prematurely. Modern units from reputable manufacturers have largely solved this, but the engineering required justifies the cost.

When budgeting for a listed property, factor in that slim glazing is an investment in compliance as much as comfort. It’s the price of combining heritage preservation with modern living standards.

Honest Thermal Performance

Let’s be straightforward about what slim glazing delivers.

U-Value Reality

Standard double glazing achieves a U-value of around 1.2-1.4 W/m²K. Slim double glazing typically manages 1.7-1.9 W/m²K — noticeably less effective, though still a major improvement over single glazing’s dismal 4.8-5.8 W/m²K.

Vacuum glazing closes much of this gap, reaching approximately 1.1 W/m²K despite its minimal thickness.

Building Regulations and Listed Buildings

Listed buildings enjoy certain exemptions from Building Regulations Part L where compliance would unacceptably alter character. This means slim glazing’s higher U-value is generally acceptable for listed properties even though it wouldn’t meet the 1.4 W/m²K standard required for ordinary replacement windows. The Energy Saving Trust provides independent guidance on glazing performance if you want to compare options.

Your conservation officer and building control will confirm what applies to your specific property. The exemption isn’t automatic — it depends on demonstrating that standard glazing would harm the building’s special interest.

Frequently Asked Questions

Will slim double glazing be approved for my listed building?

It depends on the grade and your specific circumstances. Grade II listings (92% of listed buildings) have the best chances, particularly when replacing non-original windows and preserving sightlines. Grade II* requires more justification, and Grade I approval is difficult — secondary glazing is often the only acceptable option. Always seek pre-application advice from your conservation officer.

How does slim double glazing compare to standard units?

Slim units measure 12-14mm versus 24-28mm for standard double glazing. The narrower cavity means reduced thermal performance — typically 1.7-1.9 W/m²K versus 1.2-1.4 for standard units. The trade-off buys a slim profile that fits historic rebates and preserves authentic window proportions.

Is vacuum glazing worth the extra cost?

For severely restricted rebates where even slim units won’t fit, vacuum glazing may be the only viable option — and then it’s worth it. At 6-8mm thickness with U-values around 1.1 W/m²K, it outperforms standard slim glazing significantly. The cost is substantial, but for irreplaceable historic windows it can be justified.

Do slim units last as long as standard double glazing?

Modern slim units from reputable manufacturers offer comparable longevity to standard units, though the technology demands precise edge-sealing. Early slim glazing sometimes failed prematurely due to seal stress in narrow cavities. Always choose established manufacturers and check warranty terms — quality units should last 15-20+ years.

Can I get slim double glazing without planning permission?

For listed buildings, you’ll need listed building consent regardless of glazing type — this is separate from planning permission and applies to any alteration affecting character. For unlisted period properties in conservation areas, slim glazing may fall under permitted development, but always confirm with your local authority first.

Conclusion

Slim double glazing is a genuine solution for listed buildings — not a perfect one, but often the only way to combine heritage compliance with modern thermal comfort. The 12-14mm profile preserves the slender sightlines that make historic windows beautiful, at the cost of some insulating performance.

Approval depends heavily on your listing grade and circumstances. Grade II owners have realistic prospects; Grade I owners may need to consider secondary glazing instead. In every case, early conversation with your conservation officer is essential before committing to any specification.

Slim glazing is specialist work, and the right specification depends on your particular building and its grade. We make bespoke timber windows with slim and vacuum glazing for period and listed homes — tell us about your project and we’ll advise on what’s achievable and likely to gain consent.

engineered timber vs solid timber for windows

Engineered Timber vs Solid Timber for Windows

In this article, you’ll discover:

  • How engineered timber construction works and why it exists
  • sWhere solid timber still outperforms engineered alternatives
  • Stability differences in real-world UK weather conditions
  • Cost comparison: £800-1,400 vs £1,200-2,000 per window
  • Which option suits your property type and budget
  • What manufacturers won’t always tell you about both materials

Introduction

Walk into any timber window showroom and you’ll hear this question within minutes: “Is this solid or engineered?” Usually followed by an assumption that solid must be better because it’s more expensive.

It’s not that simple. Engineered timber and solid timber solve different problems. Engineered construction was developed specifically to address weaknesses in solid timber — but in doing so, it trades away some qualities that make solid timber desirable.

We manufacture timber windows in both engineered and solid construction. This isn’t a sales pitch for one over the other — it’s an honest comparison to help you choose what’s right for your situation.

How Engineered Timber Works

Engineered timber isn’t a compromise material. It’s a deliberately designed product that improves on solid timber in specific, measurable ways.

The Construction

Engineered timber window frames are built from multiple layers of timber bonded together under pressure. Typically three to five laminations, each around 15-25mm thick, are glued with waterproof adhesive so the grain direction alternates between layers.

This alternating grain is the engineering principle. Timber naturally expands and contracts across the grain — but barely at all along it. By crossing grain directions between layers, each lamination restrains the next. The result is a frame that moves significantly less than solid timber when moisture levels change.

Why It Matters for Windows

Windows experience more moisture variation than most building elements. The exterior face gets rained on, the interior face stays dry, and the difference creates stress across the frame section. Solid timber responds by moving — sometimes enough to distort the frame, bind sashes, or crack finishes.

Engineered frames resist this movement. They stay straighter, hold tighter tolerances, and maintain consistent operation through seasonal changes. For flush casement windows where even small distortions show, this stability is particularly valuable.

Where Solid Timber Excels

Engineered timber wins on stability. But solid timber has genuine advantages that matter to certain buyers.

Character and Grain

Solid hardwood — particularly oak — has a visual depth and character that laminated construction can’t replicate. The continuous grain running through the full section creates patterns and colour variations that people value precisely because they’re natural and unrepeatable.

For windows that will be oiled or stained rather than painted, this grain visibility matters. You’re looking at the timber itself, not a painted surface, and the difference between solid oak and laminated sections is visible to anyone who knows what they’re looking at.

Longevity

Solid hardwood windows, properly maintained, outlast engineered alternatives. Oak window frames in good condition routinely last 60-100+ years — there are examples in medieval buildings still functioning after centuries, albeit with considerable repair history.

Engineered softwood frames have a realistic lifespan of 30-40 years. The adhesive bonds are theoretically permanent, but the softwood laminations themselves have a finite life. Meranti engineered frames push closer to 40-50 years.

Repairability

When solid timber develops problems — rot, damage, wear — it can be repaired using traditional joinery techniques. Spliced-in new timber bonds seamlessly with the original. Engineered timber is harder to repair because the laminated structure makes patching less straightforward. Damaged sections often need full component replacement rather than localised repair.

Heritage Authenticity

For listed buildings and strict conservation areas, solid timber may be required. Some conservation officers specifically reject engineered construction as insufficiently authentic for period properties. This is becoming less common as understanding of engineered timber improves, but it’s worth checking before specifying.

Stability: The Key Comparison

This is where the decision usually gets made.

How Much Movement?

Solid softwood frames can move 2-3mm across a 100mm section between wet winter and dry summer. Solid hardwood moves less — roughly 1-2mm for oak. Engineered softwood reduces this to under 0.5mm across the same section.

That difference sounds small, but it affects how windows operate. Half a millimetre of frame distortion might be invisible. Three millimetres can mean a sash that sticks in winter and rattles in summer.

Real-World Implications

Stability matters most for:

  • Sliding sash windows — sash operation depends on consistent clearances between sash and frame
  • Flush casements — tight tolerances mean any movement shows
  • Large windows — bigger frames amplify small percentage movements
  • Exposed positions — coastal, west-facing, or high-altitude locations with extreme moisture cycling

For painted casement windows in sheltered positions, solid softwood can work perfectly well. For sliding sashes on an exposed west-facing elevation, engineered construction makes a measurable difference to long-term operation.

Cost Comparison

Price differences are significant and worth understanding.

Engineered Softwood: £800-1,400 per Window

The most cost-effective timber window option. Engineered softwood offers excellent stability, good thermal performance, and a smooth surface ideal for painted finishes. It’s what we manufacture as our standard range and what suits the majority of domestic projects.

Engineered Meranti: £1,000-1,600 per Window

The middle ground. Better natural durability than softwood, finer grain for stained finishes, and the stability benefits of engineered construction. A sensible upgrade for homeowners wanting hardwood character without solid hardwood prices.

Solid Hardwood (Oak): £1,200-2,000 per Window

The premium option. The price reflects the timber cost (quality joinery-grade oak is expensive), the longer manufacturing time (solid timber needs more careful selection and seasoning), and the inherent material value.

What Drives the Price Gap?

About 40% of the difference is raw material cost — solid oak sections are more expensive than laminated softwood. Another 30% is manufacturing time: solid timber requires more careful handling, selection, and finishing. The remaining 30% covers the longer seasoning and quality control process.

Which Should You Choose?

The honest answer depends on three factors.

Budget

If cost matters — and it usually does — engineered softwood provides the best value. You get excellent stability, good performance, and a 30-40 year lifespan at the lowest price point. The painting process and factory-applied finish provide protection that maximises this lifespan.

Appearance

If windows will be painted (white, cream, heritage colours), engineered timber is the rational choice. You can’t see the construction under paint, so you’re paying extra for solid timber that nobody will appreciate visually.

If windows will be oiled, stained, or left natural, solid hardwood is worth the premium. The grain character is visible and adds genuine aesthetic value.

Exposure

Properties in exposed locations — coastal areas, hilltops, west-facing elevations with driving rain — benefit most from engineered construction’s superior stability. Sheltered, south-facing positions in mild climates put less demand on the frame, making solid timber a more viable choice.

The Honest Manufacturer’s View

Here’s what we tell customers: for 80% of domestic projects, engineered softwood is the right choice. It performs better than solid softwood, costs less than solid hardwood, and delivers a 30-40 year service life with proper maintenance.

Solid oak is the right choice for listed buildings requiring authenticity, stained or natural finishes where grain matters, prestige projects where material quality is a priority, and buildings expected to last generations.

Engineered meranti splits the difference well for customers wanting hardwood durability with engineered stability.

Frequently Asked Questions

Is engineered timber as strong as solid timber?

For window applications, yes. The laminated construction actually improves consistency — you don’t get the weak points (knots, grain deviation) that occasionally occur in solid sections. The adhesive bonds used in modern engineered timber are stronger than the timber itself. Frame strength is not a concern.

How long do engineered timber windows last?

Engineered softwood windows typically last 30-40 years with proper maintenance. Engineered meranti extends this to 40-50 years. Solid oak can last 60-100+ years. All figures assume regular maintenance — repainting or re-oiling every 8-12 years with factory-applied microporous finishes.

Can you tell the difference once painted?

No. Under paint, engineered and solid timber windows are visually identical. The only practical difference is long-term stability and operational consistency. If you’re painting your windows, the choice should be driven by performance requirements and budget, not aesthetics.

Do conservation areas accept engineered timber?

Increasingly, yes. Most conservation officers now accept engineered timber window frames, recognising that the material meets or exceeds solid timber performance. A minority still require solid timber for listed buildings. Check with your local authority before specifying.

Which is more sustainable?

Engineered timber arguably uses resources more efficiently — smaller sections of timber are laminated to create frames, reducing waste and allowing use of faster-growing species. However, solid timber’s longer lifespan means fewer replacements over a building’s life. Both are significantly more sustainable than uPVC or aluminium alternatives.

Conclusion

Engineered timber isn’t a budget compromise and solid timber isn’t automatically better. They’re different solutions for different requirements.

Choose engineered for painted finishes, exposed locations, tight-tolerance designs, and value-conscious projects. Choose solid for visible grain, heritage authenticity, maximum longevity, and buildings where material quality is a statement.

At Timber Windows Direct, we manufacture bespoke windows in engineered softwood, engineered meranti, and solid oak. Request your free quote and we’ll recommend the right material for your specific project — honestly, without pushing the more expensive option.