Sash Cord Replacement: Complete DIY Guide

In this article, you’ll discover:

  • How to tell when sash cords need replacing
  • Step-by-step replacement process with clear instructions
  • Cord types compared — waxed cotton, synthetic, and chain
  • Tools you’ll need (most you probably already own)
  • How to rebalance sash weights after replacement
  • When to hire a professional instead

Introduction

A broken sash cord is the most common reason timber sash windows stop working properly. One day the window slides smoothly; the next, the sash drops when you let go or won’t stay open at all.

The good news? Sash cord replacement is genuine DIY territory. You don’t need specialist tools, the materials cost under £20, and the whole job takes roughly 60-90 minutes per window once you know what you’re doing. The first one always takes longer.

We manufacture sash windows with modern spring balances and traditional weight systems. This guide covers traditional corded sash windows — the type found in most Victorian and Edwardian homes. If your windows use spring balances, the process is different.

Signs Your Sash Cords Need Replacing

Don’t wait for complete failure. These signs indicate cords are deteriorating:

The most obvious symptom is a sash that won’t stay open — it slides down under its own weight when you release it. You might also notice one side dropping faster than the other, creating a visible tilt. Frayed or visible cord damage in the weight pockets is another clear signal.

Sometimes you’ll hear the weight drop inside the box frame — a distinctive thud that means the cord has snapped completely. If one cord has failed, the others are likely close behind. We’d always recommend replacing all cords in a window at once rather than just the broken one.

What You’ll Need

Tools

Most of these are basic household items:

  • Stiff putty knife or chisel — for removing staff beads
  • Screwdriver — for accessing weight pockets
  • Pliers — for removing old nails and cord clips
  • Hammer — for refitting beads and nails
  • Scissors or sharp knife — for cutting cord
  • Pencil — for marking cord length
  • Small nails (25mm) — for securing cord to sash

Materials

  • Sash cord — enough for all four cords in the window (typically 3-4 metres per cord)
  • Optional: new staff beads — if originals are damaged during removal

Cord Types Compared

Not all sash cord is equal. Your choice affects how long the repair lasts.

Waxed Cotton Cord

The traditional choice and still the best for most applications. Pre-waxed cotton cord runs smoothly over pulleys, resists moisture, and lasts 15-25 years in normal conditions. It stretches slightly when new, then settles. Buy 8mm diameter for most domestic sash windows — check your existing cord if unsure.

Synthetic Cord (Nylon/Polyester)

Synthetic alternatives resist rot better than cotton and cost slightly less. They’re slippier over pulleys, which can feel different to operate. Some synthetics stretch more than cotton, potentially affecting balance over time. A reasonable choice for less exposed positions but cotton remains the professional’s preference.

Sash Chain

Metal chain eliminates cord failure entirely — it simply doesn’t wear out in the same way. However, chain is noisier, doesn’t flex as smoothly over pulleys, and requires pulley replacement (larger diameter wheels). It’s worth considering for windows where access is difficult and you want a permanent solution.

Our Recommendation

Waxed cotton cord, 8mm diameter. It’s what joiners have used for over a century and it works. Don’t overthink this.

Step-by-Step Replacement

Work methodically and the job is straightforward. Here’s the process.

Step 1: Remove the Staff Beads

Staff beads are the thin mouldings running vertically inside the window frame, holding the lower sash in place.

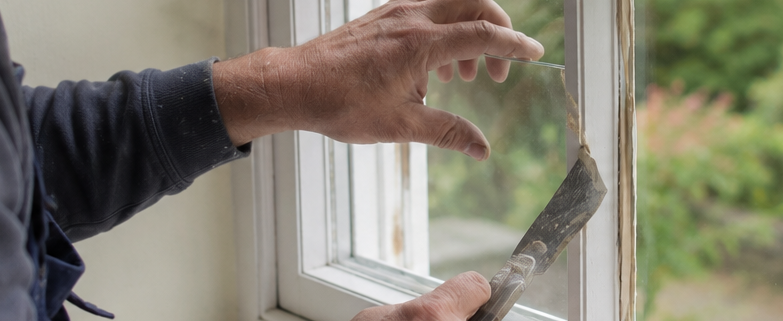
Score the paint line between the bead and the frame with a sharp knife — this prevents paint tearing. Starting from the middle of the bead, work a stiff putty knife or thin chisel behind it and gently lever outward. Work along the length, easing the bead away gradually. Don’t force it or you’ll split the bead.

Once one side is free, remove the opposite staff bead the same way. The bottom sash can now swing inward.

Step 2: Remove the Lower Sash

Swing the lower sash inward and disconnect the cords. The cords attach to the sash sides — usually nailed into a groove or held by a knotted cord in a channel. Cut the cords if they’re still intact (hold the free ends so the weights don’t drop) or simply pull out any remaining cord fragments.

Rest the sash somewhere safe. Now you can see the parting bead — the strip separating the two sash tracks.

Step 3: Remove the Parting Bead and Upper Sash

Pull the parting bead straight out from its groove — it’s usually a friction fit, not nailed. With the parting bead removed, the upper sash can come forward. Disconnect its cords the same way.

You now have both sashes removed and access to the weight pockets.

Step 4: Access the Weight Pockets

Look for small removable panels (pocket pieces) in the lower portion of each side of the box frame. These are usually held by a single screw or paint adhesion. Remove the pocket piece to reveal the sash weights inside.

Pull each weight out and note which position it came from — weights for the upper and lower sashes are different sizes. Untie or cut the old cord from each weight.

Step 5: Thread New Cord

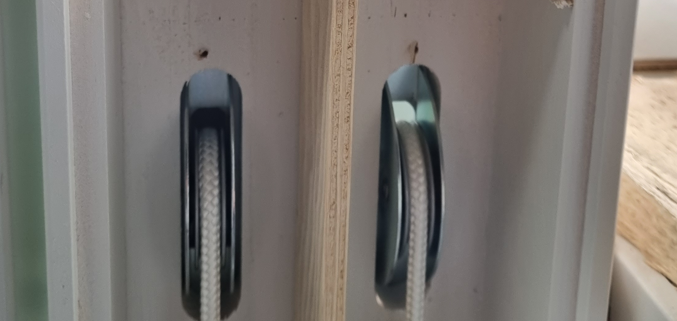
This is the part that tests patience. Feed the new cord over the pulley at the top of the frame and down into the weight pocket. If the cord won’t feed through, a small lead weight (a “mouse”) tied to string helps — feed the string first, then use it to pull the cord through.

Tie the cord securely to the weight using a figure-of-eight knot. Replace the weight in the pocket.

Step 6: Set the Cord Length

Getting the length right matters for proper operation. With the weight resting on the bottom of the pocket, pull the cord taut over the pulley. Mark the cord level with the top of the sash groove.

Cut the cord about 50mm below this mark — this extra length accounts for the knot or nail fixing at the sash. The weight should hang roughly 75mm above the bottom of the pocket when the sash is fully closed.

Step 7: Attach Cord to Sashes

Nail or knot the cord into the groove on each side of the sash. Use 25mm nails at roughly 75mm intervals if nailing. Ensure the cord sits flat in the groove without bunching.

Repeat for all four cords (two per sash). Replace the upper sash first, then the parting bead, then the lower sash, then the staff beads.

Step 8: Test and Adjust

Both sashes should now slide smoothly and stay in any position you leave them. If a sash drops slowly, the cord may be slightly too long — the weight is bottoming out before the sash closes fully. If the sash won’t close completely, the cord is too short.

Minor adjustments are normal on the first attempt. Don’t be discouraged.

Rebalancing Sash Weights

While you have the weights out, it’s worth checking they’re correct.

Weight Matching

Each weight should be approximately half the weight of its corresponding sash (including glass). The lower sash weights are typically lighter than the upper sash weights because the upper sash is usually heavier (more glass, thicker frame).

If sashes don’t balance properly after cord replacement, the weights may have been swapped at some point. Weigh each sash and adjust accordingly — additional weight can be added by drilling a hole in the lead weight and pouring in extra lead, or you can source replacement weights.

When Weights Need Replacing

If your windows have been reglazing with thicker double-glazed units, the original weights won’t balance the heavier sashes. You’ll need heavier weights — or a conversation about whether spring balances might work better for your situation.

When to Hire a Professional

Sash cord replacement is manageable DIY, but some situations justify professional help.

Consider a professional if your windows have significant timber decay (the repair may need more than just new cords), the sash weights are missing or incorrect, the pulleys need replacing (common in older windows), or you’re dealing with very large or heavy sashes that are difficult to handle safely alone.

Professional sash cord replacement typically costs £150-250 per window, including cord, labour, and any minor adjustments. If multiple windows need attention, most joiners offer better rates for batch work.

For windows where the timber is beyond repair, replacement timber sash windows with modern spring balances eliminate cord maintenance entirely.

Frequently Asked Questions

How long does sash cord last?

Waxed cotton sash cord typically lasts 15-25 years depending on use and exposure. Windows opened daily wear cords faster than rarely used ones. Synthetic cord lasts slightly longer but can stretch more over time. Replacing all cords at once is more efficient than addressing them individually as they fail.

Can I replace sash cord without removing the sashes?

Not properly, no. You need to remove both sashes to access the weight pockets and correctly set cord length. Shortcuts exist — feeding cord through without removing sashes — but they rarely result in properly balanced windows and you can’t inspect the weights or pulleys.

What size sash cord do I need?

Standard domestic sash windows use 8mm diameter cord. Larger Georgian or Victorian sashes may need 10mm. Check your existing cord before ordering — or measure the pulley groove width. Too-thin cord wears faster; too-thick cord won’t run smoothly over the pulleys.

Should I replace all cords at once?

Yes. If one cord has failed, the others are the same age and likely close behind. Replacing all four cords takes only marginally longer than doing one, and you avoid repeating the disassembly process when the next cord fails months later.

Is it worth converting to spring balances?

Spring balances eliminate cord maintenance entirely and can accommodate heavier double-glazed sashes. They’re worth considering when replacing windows or carrying out major sash window restoration. For routine cord replacement on otherwise sound windows, traditional weights remain perfectly effective.

Conclusion

Sash cord replacement is satisfying DIY — the kind of repair that produces an immediately noticeable improvement. A window that’s been dropping or sticking for months suddenly slides like it should.

Take your time on the first window, replace all cords at once, and use quality waxed cotton cord. The whole job costs under £20 in materials and saves you £150-250 per window in professional fees.

If your sash windows need more than new cords — or you’re considering replacement — get in touch for a free quote on bespoke timber sash windows with either traditional weights or modern spring balances.

Flush Casement Windows: Traditional Style for Period Properties

In this article, you’ll discover:

  • What makes flush casement windows different from standard casements
  • Why conservation officers specifically require flush designs
  • Cost premium versus standard casement windows (and whether it’s justified)
  • Hardware and ironmongery options for authentic period styling
  • Which timber species suit flush casement construction
  • How to specify flush casements for Building Regulations compliance

Introduction

The difference between a flush casement and a standard stormproof casement is subtle — roughly 15mm of timber. But that small detail determines whether your windows look authentically period or obviously modern.

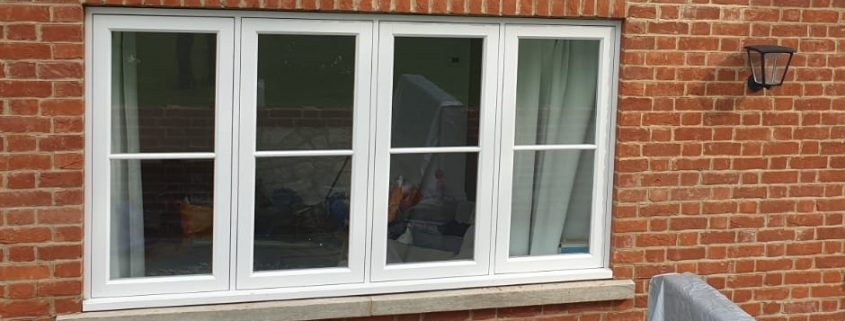
In a flush casement, the opening sash sits level with the outer frame when closed. No overlap, no stepped joint, no shadow line. The result is a clean, flat facade that defined window design from the Georgian era through to the early twentieth century.

It’s not just an aesthetic preference. Conservation officers in many areas specifically require flush casements for replacement windows in period properties. Getting this wrong means a refused application and wasted money.

We manufacture bespoke flush casement windows in engineered softwood, meranti and oak. This guide explains what makes them distinctive, when they’re required, and how to specify them correctly.

What Makes Flush Casements Different?

The distinction is straightforward but important.

Standard Stormproof Casements

In a stormproof casement, the sash overlaps the frame when closed. The sash sits proud — projecting forward from the frame face. This creates a stepped joint that sheds rain effectively and produces visible shadow lines on the facade.

Stormproof profiles developed during the twentieth century. They’re practical, weatherproof, and suit post-war housing, cottages, and contemporary designs. But they’re historically wrong for Georgian, Victorian, and Edwardian properties.

Flush Casement Design

In a flush casement, the sash closes into a rebate so its front face aligns exactly with the frame. From outside, the window presents a single flat plane — frame and sash on the same level.

This is how casement windows were built before mass production changed everything. Every pre-Victorian casement you’ll find in a period property uses flush construction. The design requires more precision in manufacture — tolerances are tighter because there’s no overlap to hide imperfections.

Why the Difference Matters

On a Georgian townhouse or Victorian villa, stormproof casements look wrong. The projecting sash profile didn’t exist when these buildings were designed. Conservation officers know this, architects know this, and increasingly, homeowners notice too.

The visual impact is significant. A terrace of period houses where one property has stormproof casements stands out immediately — and not in a good way.

Conservation Areas and Planning Requirements

Flush casements aren’t just a style preference in many locations — they’re a planning requirement.

When Flush Design Is Required

Conservation officers typically require flush casements for:

  • Listed buildings — Grade I, II* and II listings almost always demand flush profiles
  • Conservation areas with Article 4 directions — where permitted development rights are removed
  • Properties visible from public highways in designated conservation areas
  • Period buildings where original windows were demonstrably flush design

The requirement stems from a simple principle: replacement windows should match the character of what was originally there. If the originals were flush, replacements should be too.

What Officers Actually Assess

Planning applications for window replacement get scrutinised on specific details:

  • Profile depth — flush alignment, not projecting sashes
  • Glazing bar pattern — matching original configurations
  • Materialtimber is almost always expected over uPVC
  • Opening method — matching original (side-hung, top-hung)
  • Ironmongery — traditional styles, not modern fittings

Getting the profile wrong is one of the most common reasons for refusal. Officers can — and do — require removal of incorrectly specified windows after installation.

Pre-Application Advice

Before committing to any specification, contact your local conservation officer for pre-application advice. It’s free, informal, and saves expensive mistakes. Most officers are helpful when you demonstrate willingness to get things right.

Cost: Flush vs Standard Casement

Flush casements carry a premium over standard stormproof casements. Here’s what that looks like in practice.

The 15-20% Premium

Expect flush casements to cost roughly 15-20% more than equivalent stormproof casements. For a typical three-bedroom Victorian terrace needing 6-8 windows, that translates to approximately £600-1,500 additional cost across the project.

The premium reflects tighter manufacturing tolerances, more complex weatherproofing (without the overlap, weather seals work harder), specialist hardware, and higher finishing requirements — imperfections show more on a flat-plane window.

Is the Premium Justified?

For period properties — particularly listed buildings and those in conservation areas — the premium isn’t optional. You’ll pay it because planning requires it.

Even where not required, flush casements often represent good value for period homes. The visual improvement is substantial, and authentic-looking windows add measurable value to period properties. Estate agents consistently report that sympathetic fenestration matters to buyers of character homes.

Where Standard Casements Are Fine

Don’t pay the flush premium where it isn’t needed. Post-war housing, contemporary builds, and properties with no period character gain nothing from flush profiles. Standard stormproof casements are perfectly appropriate — and more cost-effective.

Hardware and Ironmongery

Hardware choice makes or breaks the period authenticity of flush casement windows.

Hinge Options

Flush casements use different hinge types than stormproof windows. Butt hinges are the traditional choice — visible when the window is open, period-appropriate, and what conservation officers expect. Cranked hinges allow the sash to clear the frame when opening. Concealed hinges offer a modern alternative but lack authenticity.

For conservation area applications, butt hinges are usually the safest specification.

Handle Styles

Traditional flush casement handles include cockspur handles (classic for painted flush casements), espagnolette handles (operating multi-point locking for modern security), and peg stays for holding sashes open. Black antique iron, pewter, and polished brass suit most period properties. Avoid satin chrome and white plastic — both read as modern regardless of handle style.

Timber Species for Flush Casements

The timber choice affects both appearance and long-term performance.

Engineered Softwood

Engineered softwood offers excellent stability — important for flush casements where tight tolerances mean any warping shows immediately. Laminated construction resists movement better than solid timber in most conditions. Lifespan of 30-40 years with proper maintenance. The most cost-effective option for painted finishes.

Meranti

Meranti hardwood provides natural durability (40-50 years) and fine grain that takes stain and paint beautifully. Its dimensional stability suits the precision requirements of flush construction. A strong middle-ground choice.

Oak

The premium choice for period properties where natural timber character is desired. Oak’s visible grain and natural colour complement Georgian and Victorian architecture beautifully. Lifespan of 60+ years. Oak flush casements can be left natural — the only timber option where an unpainted finish looks genuinely period-appropriate.

Thermal Performance and Weatherproofing

Flush casements must meet the same Building Regulations as any replacement window.

Building Regulations Part L requires a maximum U-value of 1.4 W/m²K. Modern flush casements comfortably achieve this with standard double glazing — typical performance sits between 1.2-1.4 W/m²K.

The flush profile creates a different weatherproofing challenge. Without the overlapping sash, weather seals carry more responsibility. Quality flush casements use perimeter compression seals, drainage channels, and precise machining to achieve identical weather resistance to stormproof designs. Budget manufacture is where problems appear — this isn’t a specification to economise on.

Trickle vents can be incorporated into flush casement frames, meeting Part F requirements (8000mm² per habitable room) without compromising the clean facade.

Frequently Asked Questions

What is the difference between flush and stormproof casement windows?

In a flush casement, the opening sash sits level with the outer frame — creating a flat, clean facade. In a stormproof casement, the sash overlaps the frame, projecting forward. Flush casements are historically correct for pre-twentieth-century properties, while stormproof designs are a more modern development suited to cottages and post-war housing.

Do conservation areas always require flush casement windows?

Not always, but frequently. Properties with Article 4 directions in conservation areas typically require flush casements if the originals were flush design. Listed buildings almost always require them. Contact your local conservation officer for specific requirements before specifying — pre-application advice is free.

Are flush casement windows more expensive?

Yes — typically 15-20% more than equivalent stormproof casements. The premium reflects tighter manufacturing tolerances, specialist hardware, and more complex weatherproofing. For a typical project of 6-8 windows, expect roughly £600-1,500 additional cost.

Can flush casement windows be double glazed?

Absolutely. Modern flush casements incorporate double or triple glazing meeting Building Regulations Part L (U-value 1.4 W/m²K maximum). The traditional external appearance is maintained while delivering contemporary thermal performance. There’s no energy efficiency compromise.

How long do flush casement windows last?

Lifespan depends on timber species: engineered softwood 30-40 years, meranti 40-50 years, oak 60+ years. Proper maintenance — repainting or re-oiling on the manufacturer’s recommended cycle — is essential. Factory-applied microporous finishes typically need refreshing every 8-12 years.

Conclusion

Flush casement windows are the correct choice for Georgian, Victorian, and Edwardian properties — and often the only choice conservation officers will accept. The 15-20% premium over standard casements reflects genuine manufacturing complexity, not marketing markup.

Specify the right timber species for your situation, choose historically appropriate ironmongery, and ensure the manufacturer can achieve the tight tolerances flush construction demands. Get these details right and you’ll have windows that look authentically period while delivering modern thermal performance.

At Timber Windows Direct, we manufacture bespoke flush casement windows in engineered softwood, meranti, and oak — built to your exact specifications. Request your free quote and let’s discuss what your period property needs.